
The Science of Waves: Awesome Sound Experiment for Kids
By: Author Jacquie Fisher
Posted on Published: April 16, 2019
Categories Kids Activities & Crafts , Science Experiments
One of the coolest sound wave experiments your kids will ever try!
We love doing simple science experiments and every once in a while, we find a GEM.
It’s a simple, easy and pretty awesome experiment that explores the science of sound waves and how they travel .

Sound Experiment for Kids
So many of the science activities we do are ones that I’ve experienced before but are new to our kids.
And honestly, as they approach Middle School age, it’s getting harder and harder to impress them 😉
But THIS ONE!
This is one of those really cool experiments that they thought was super cool and even I was impressed with ( and as my husband will tell you, I’m not easily impressed 😉
I should have titled this “ Make Your Own Gong Using a Spoon and Fork ” — because that’s exactly what you’ll get to do!
Like our How does a Leaf Breathe? experiment , this sound wave project also explores the invisible side of science.
As you begin this vibration experiment, explain to your kids that you are going to test how sound travels.
They may not realize that when a ‘noise’ is made, it creates sound waves (which are not visible) that travel through the air and to our ears.
As with any of our experiments, we always start with a good book to help explain the science concepts!
Books about the Science of Sound Waves

Here are a few great books to pair with this activity along with affiliate links so you can easily learn more about each one:
Sounds All Around (Let’s-Read-and-Find-Out Science 1) is part of an amazing science book series that cover all the topics under the sun! This book explains how sound waves travel, how your ear receives sound and answers for more of the questions kids will ask.
And another fun book, What’s That Sound (Science Solves It! ) has facts & activities related to sound – perfect for kids ages 6 – 10 years old.
Sound Experiments for Kids
You’ll need a few items that I’m sure you can easily find around the house — the affiliate links in our list will give you a quick description of each item:
- A ruler (we found a wooden or heavy plastic ruler worked best)
- Two different size spoons (try using a teaspoon and a serving spoon )
- About 4 feet of string or yarn (this will depend on how tall you are as you can see below)

First, create a loop in the middle of the yarn/string and insert the handle of the spoon.
Pull tightly so that the spoon hangs in the center of the yarn/string and you have two long pieces of approximately equal length.

Then make a face at your Mom when she asks to take your photo ( this is an optional step, of course ) 🙂

Take each string and wrap them around your pointer finger on each hand.
Then push the string against each ear (not into the ear but just outside like you are going to plug your ears because you don’t want to hear your Mom ask you to do your chores 🙂
You’ll want the spoon to hang just below the waist once both ends of the yarn are placed near the ears.

You can see in this photo that you don’t have to use the end of each piece of yarn/string — in fact, as you do the experiment, change how high or low the spoon hangs to see if it changes the sound.

Ok, here’s the big moment …
Once the string in pushed against the ears, have someone GENTLY hit the ruler against the round part of the spoon — and watch the look on your child’s face (priceless!)
Warning : Kids often think that the HARDER they hit the spoon, the louder the sound — be sure to test out this theory too!
If you are using a small spoon, you should hear a distinct bell sound — with a larger spoon, it will sound more like a gong.
Pretty cool!

The Science Behind Sound Wave Experiments
Here’s what’s really happening during the activity — I’ve highlighted some of the science terms that you can introduce to kids when discussing this experiment:
When the ruler hits the spoon, it creates vibrations which make sound waves. These sound waves travel up the yarn/string and to the ear instead of just spreading out into the air around you.
The yarn acts as a conductor — an object that allows sound waves to travel.
Depending on the size of the spoon and the length of yarn, the sound will appear higher (like a church bell) or deeper (like a gong).
And because the yarn allows the sound waves to continue to travel, the sound of the spoon will resonate or reverberate — meaning they will continue for a while after you have hit the spoon.
Another thing we found was that the only one who can hear the bell or gong sound will be the person with the string near their ears — which we thought was also pretty cool.
Everyone else in the room will just hear a faint ‘tink’ when the ruler hits the spoon.

More Ideas for Sound Experiments
Ok, we wanted to play around with the experiment a little more — so we also used a serving fork (which is larger than a regular fork).
Do this too and you’ll see that the tines on the fork create a totally different sound.
You can also try different types of yarn/string — you’ll find that the more dense the string, the better the sound will travel.
For more sound wave experiments, try
- the Geeker Speaker Lab Kit which shows you how to make sound waves visible with 5 different experiments!
- the Science of Sound box from Steve Spangler includes up to 10 sound experiments kids can do !
And don’t forget to see all of our simple science experiments!
If you’re looking for more ideas that explore sound waves, try these items:
More Human Body Science Experiments
Fingerprint Science for Kids
How Long are Your Small Intestines?
Looking for more Easy Science Experiments? Try these!
How do Leaves Breathe?
How much Water is in Snow?
Does Your Food Sink or Float?
27 Simple Science Experiments

You might also like:
20 Science Experiments in a Jar

Sound Wave Lab
Developed by Trish Loeblein
Students use the “ Sound ” simulation from the PhET Interactive Simulations to understand how different sounds are modeled, described and produced. They also design ways to determine the speed, frequency, period and wavelength of a sounds.
Science Topics
Parts of Waves Speed of Sound Frequency
Process Skills
Scientific Inquiry Observing Inferring Data Collection
Grade Level
Preparation.
5-10 minutes
50 minutes*
*If you are doing this with middle school students, it will take longer.
Learning Goals
Students will be able to:
- Explain how different sounds are modeled, described, and produced.
- Design ways to determine the speed, frequency, period, and wavelength of a sound wave model.
Sound Wave Lab Word Doc Sound Wave Lab PDF Sound Wave Lab Worksheet Word Doc Sound Wave Lab Worksheet PDF
Materials not in Kit
Computers with “ Sound ” simulator from PhEt Interactive Simulations (at least 1 computer for every 3 students)
Optional Materials
String Slinky
Set up the simulator on classroom computers by going to: https://phet.colorado.edu/en/simulation/legacy/sound
Please review the Software Requirements before downloading.
Introduce the Activity
This simulation has been tested with students from grade school to college, and the interface has been intuitive for all students tested. We have observed that too much instruction on the simulation creates a barrier between the students and the simulation.
Doing the Activity
If you would like, use the slinky and rope to review longitudinal and transverse waves.
- Discuss how waves on a string are generated and how energy moves through the string.
- Ask a student to help you by holding the end of the slinky and demonstrate how energy travels from you to the student via the wave on the slinky.
Show the students how the simulator is modeling compression and rarefaction with dark and light colors.
NOTE: Some people think black represents emptiness and light represents more intensity, and some people think the inverse is true. Have students investigate using the first tab, to see that when the speaker is going out, the sound wave looks light. This can be a little tricky to observe, but using low frequency helps. Then go to the last tab and evacuate the chamber, it will make sense that the color goes black like space. Ask the students to determine what is being represented and they should choose black for low density.
Pass out the lab worksheet. Students should work individually or is groups of 2 or 3 to answer the questions.
- When the worksheet asks students for citation, you should just be looking for the source of their information is fine. This is usually a website or from a textbook. It’s good to get students into the habit of being able to back up their facts.
- The last questions about ultra-sound are designed to get students thinking about the size of ultra-sound waves compared to audible sounds.
Key Lesson Terminology
Compression – The region of the wave where air particles are compressed together.
Rarefaction – The region of the wave where air particles are spread apart.
Frequency – Wiggles per second (moves back and forth)
Amplitude – For transverse waves, it is the maximum height of the wave. Larger amplitudes create louder sounds.
Period – The time it takes for one wave to go by.
Wavelength – The distance between two successive, identical parts of the wave. Ex. Crest to crest, or trough to trough.
Optional Extensions
The Anatomy of a Wave (middle school & high school) is good to continue working on the basic properties of transverse and longitudinal waves, including resonance.
Create a wave on a string in the classroom by using a long string/slinky or rope. It should be possible to change the amplitude, frequency and tension while oscillating the string/slinky/rope. It is difficult to change damping, however.
Earthquakes – after this, lesson students are more ready to learn about Primary and Secondary seismic waves and how they travel through the earth. The idea that depending on the part so the earth the wave travels through, it may arrive at a location at a different time.
Modifications
The PhET website can be viewed in many languages, and learners can experiences the simulations in their native language to help them fully understand the material being presented.

Sound Experiment for Kids to See Sound
I love science! There are so many hands-on science experiments you can do with kids! Right now we are learning all about sound in our classroom. I have personally found that having a sound experiment for kids to demonstrate what they are learning is the best way for children to really understand the material.
So, I came up with a few sound experiments for kids, including my favourite tuning fork sound experiment and vibrating rice.
Keep reading for a few simple, hands-on ways to making learning about sound fun and meaningful.
The experiments work well in the classroom or at home.
Introducing big, but important concepts, such as sound and hearing, to young children may seem early; however, I am always amazed by how much children of all ages learn from hands-on science experiments.
When children are interested in a topic, they absorb and understand a lot of the material.
Slinky Sound Experiments
Kids are naturally drawn to do experiments and play and explore with their hands. I like to do this sound experiment with kids as a way to introduce big science concepts to young minds.
I have done this experiment with kids aged 3-10 and it is a hit with all of them. All you need is a slinky. A large one works best, but any size will work.
Sound Experiments Steps
I started by using a large slinky and having one child and I hold the ends on opposite sides of the carpet. I banged the slinky to send a wave to the other side. We talked about how sound travels in waves.
A big, fast wave equals a loud sound – like someone yelling. A small, slow sound wave may be someone humming. I either hummed or yelled as I banged the slinky to replicate how the volume and sound travels.
Sound Waves
Sound Experiment
The main idea you want to make clear is that sound travels in waves. Also, it is important that children know that sound waves are invisible.
The slinky is just a fun way to show what we can’t otherwise see.
Some students even noticed the slinky bounce back after reaching the student holding the other end of the slinky. This was a great chance to discuss echoes and how sound bounces.
Fork a Sound Experiments
This is perhaps my favorite sound experiment for kids! I love the excitement that it causes and the ‘explosive’ result. Also, kids of all ages are able to get hands-on and do the experiment. You only need a few materials:
- Plastic Wrap
- Uncooked rice or Large Sparkles (I added some food coloring to mine, but the color is just for fun.)
- Tuning Forks
Since I did this experiment with several groups, I had several containers ready to go. I grouped Children into groups. The smaller the groups the better.
Cover each container tightly with plastic wrap. The wrap has to be tight or the experiment will not work.
To start, I introduced the children to tuning forks. Many had not used or seen one before. Some recognized the fork being used in their music class before.
I gently banged one of the forks onto the carpet and held it up. We could hear a bit of a sound coming from the fork.
I had a child beside me gently touch the fork. They were able to feel that it was vibrating, but as soon as they touched the tuning fork the vibrations stopped.
We talked about the fact that when it was vibrating, it was making a sound. When it stopped vibrating, the sound also stopped.
Children then each had a chance to gently try out the tuning forks. They loved the hands-on experience. (I would suggest making sure to tell children not to hit the tuning forks too hard. Just a bit of a bump will work. Also make sure they are not banging it on anything that could break.)

Next, children went to the tables with a small group. Each group got a container with the plastic wrap stretched across it. I then gave each group a small container of rice. You only need a small amount for each group.
Also, the more rice you give each group the more clean up there will be. The rice will go flying!!! (But that’s also the fun of the experiment.)
Children then pour the rice onto the plastic wrap. They make a guess what will happen once they touch the tuning fork to the plastic wrap.
Once they have guessed, they are ready to do the experiment.

When banged, the tuning fork vibrates, which creates a sound. Tap the fork so that it is making a sound, and vibrating.
Next, touch the vibrating fork to the plastic wrap, but be sure not to touch the side of the bowl. You only need to touch it gently to get the result.
As soon as the vibrating fork touches the plastic wrap, it sends vibrations across the wrap and to where the rice is sitting. These vibrations cause the rice to “jump” until the vibrations/sound stops.
The tuning forks are ideal to have on hand when teaching or learning about sound.

There was so much excitement in the room when the rice started bouncing everywhere! The mess is definitely worth the learning that occurred! Since the materials you need are so simple, you can repeat this tuning fork experiment several times.
I really wanted each child to be able to do the hands-on experiment. After each child got the rice to jump, the group worked together to gather the rice and put it back on the plastic wrap for the next child’s turn.
Repeat as many time as you wish!

Sound Experiments Extension Activity
The tuning fork experiment sparked so much interest in my classroom that I wanted to extend our activity for another science lesson. If you have all of the materials for the fork a sound experiment, all you need extra to do another experiment is water!
As an extension, you can remove the plastic wrap and fill the glass bowls with water. I also added a few drops of food coloring just for fun.
Repeat the experiment above by banging the tuning fork and then touch it to the container with water. Make sure to only touch the water, and not the container.
When the fork is touched to the water it makes the water splash out of the bowl. This sound experiment is an easy way to show kids that sound causes vibrations/movement. Happy experimenting!
For your convenience, this post contains affiliate links. As an Amazon Associate I earn from qualifying purchases and I may earn a small commission at no cost to you.
Rust-Oleum 376855 Stops Rust Custom Spray 5-in-1 Spray Paint, 12 oz, Flat Black

Educational Insights Kanoodle 3D Brain Teaser Puzzle for Ages 7+ Brain Games for Kids and Adults, Travel Games

Melissa & Doug Farm Wooden Cube Puzzle With Storage Tray – 6 Puzzles in 1 (16 pcs) – FSC Certified
Join hands-on teaching ideas.
Join Hands-On Teaching Ideas to gain access to my Free Resource Library filled with lots of printable learning resources, from a choice board full of STEM activities for kids to escape room games, you can download anything that interests you for your classroom or home.
Click “Subscribe Today” button below to subscribe and download the STEAM choice board right away.

More Hands-On Teaching Ideas
If you enjoyed the sound experiments above, you may like the activities below. From science to art and even escape rooms, I’ve got lots of learning activities to keep children busy.
Leave a Reply Cancel Reply
Your email address will not be published.
Science Experiments with Sound: 8 Fun Activities for Kids
*We’re an affiliate – we may earn a commission through qualifying purchases from the links on this page. As always, thanks!*
Sound is all around us, traveling in invisible waves. Since we can’t see it, we often take sound for granted. Today we’re doing some science experiments with sound. We’ll have some fun learning how sounds waves vibrate, how we can affect the vibrations, and how this affects what we hear. Listen up & let’s explore!
Jump to your favorite science experiment with sound: Sound Vibrations on a Flat Surface Drinking Glass Bells Cup and String Phone Big Box Bass Sound Tubes Stretched Strings Pipe Organ with Cardboard Tubes Soundproofing
Sound Vibrations on a Flat Surface
Here’s an easy science activity with sound we can do using items you most likely have in your kitchen. We’re going to see how sound waves cause vibrations and the affect this has on objects. You’ll need a few household items:
The plastic acts in much the same way as your eardrum. When sound waves hit your eardrum, they cause it to vibrate. In the case of your eardrum, it’s sending those vibrational signals to your brain instead of bouncing grains of salt like we have on our plastic. We found watching the rice move easier than the salt or sugar.
Experiment with different sounds and volumes and note how the salt moves in relation to the sound. We found putting a bluetooth speaker inside the bowl before covering the top with plastic wrap helped a bit. Play something with a thumpy bass line and watch you grains dance across the plastic.
Drinking Glass Bells
Notice how the amount of water in each glass affects the pitch. Less water makes a lower pitch, while more water creates a higher pitch. Why do you think that is?
Cup and String Phone
This is a classic, and can be done with plastic cups or tin cans. It’s a great way to experiment with how sound vibrations can travel. We had some plastic cups, which are easier to punch holes in, so this is what we used. Here’s what you’ll need:
Related Posts: Check out our full posts on plastic cup projects and activities with household objects for some fun things to do with items you probably already have around the house. Great no-prep ideas for you and your child!
Big Box Bass
Plucking the string causes it to vibrate. The inside of the box is a resonating chamber, and the hold you cut in the top is a sound hole; much like an acoustic guitar. The tighter the string, the higher the pitch that will be produced. The more slack, the lower the pitch.
We found the box needed some weight inside the box to hold it down while playing it. Free weights, a few bricks, or whatever you can fit inside the sound hole should do the trick. Push down a bit on the broomstick as you play so it is secure on the bottom. Make sure there is tension on the string as you pluck it. Try plucking it and shifting the broomstick so it’s looser or tighter to get some good twangs out of the string.
Sound Tubes
We got some of these “Pull and Pop” tubes for the kids to play with. They’re fun on their own, but we discovered a cool sound experiment playing with them. If you expand a tube all the way and swing it around in a circle, it makes a cool sound. The corrugated shape lends itself well to sound. These kids toys are also known as a whirly tube, corrugaphone, or bloogle resonator.
What’s Happening?
Pro Tip: If you’re interested in these, get a larger pack . Our kids loved these so much they crinkled them to death, to the point where we couldn’t collapse some of them anymore. They’re great to play with, but will only survive so long.
Stretched Strings
Stringed instruments are capable of producing a wide range of pitches. We’re going to create a simple exercise with one string to experiment with how this concept works.
The popsicle stick in this case is like the bridge on a guitar or violin. Adding or removing weight from the bucket is similar to adjusting the tuners. It changes the tension on the string which results in a change in pitch. More tension makes the pitch higher, and less tension gives a lower pitch. This simple principle is what makes stringed instruments work.
What do you think would happen if you tried a thicker fishing line or different string? How would it affect the sound?
Pipe Organ with Cardboard Tubes
")
DIY Soundproofing
We’re going to look at two major factors: Materials and Shape. Have you ever noticed how some rooms or spaces echo sound and some do not? The surface materials have much to do with how sound waves travel within that space. Materials like tile or concrete reflect the sound, while softer materials like carpeting or foam absorb the sound.

The sound is dampened by the egg carton and towels. The materials are soft, and absorb the sound instead of reflecting it. The surface of the egg carton is uneven and reflects the sound at a number of angles, weakening it.
Science Experiments with Sound – Wrap Up
More fun activities.
Looking for more STEM Projects and Activities? Check out our other STEM Challenges .
Latest Posts
Kitchen science activities with food for kids: play with your food for science, how to keep pumpkins from rotting, delicious discoveries: edible science experiments for kids.
Teach Starter, part of Tes Teach Starter, part of Tes
Search everything in all resources
Fun Sound Experiments for Kids to Add to Your Sound Energy Lessons

Written by Jeanne Sager
Did you hear that? We’re pretty sure we heard that you were looking for some new sounds experiments for kids to add to your teacher toolbox.
While most kids are pretty accustomed to the concept of sound itself — ahem, 0 voices , kiddos — teaching kids how the vibrations of objects translate into sound isn’t just a core part of the science curriculum. It’s also a means to connect kids in a very real way to the world around them. So how do you start teaching kids about sound? And what are some sound science experiments you can try in the classroom? Let’s dive in.
Sound Experiments for Kids
Let’s face it — teaching about sound is going to vary depending on the subjects you teach. If you teaching English, you may start with onomatopoeia , working with kids to add words like “pop” and “bang” to their writing to bring the richness of sound into their narratives. And if you’re a music teacher, you’re going to go straight for the instruments.
We can’t cover all the pretty cool ways out there for incorporating the teaching of sound into the classroom, but we can tell you some of the Teach Starter teacher team’s favorite sounds experiments for kids!
For each sound experiment, students can draw a hypothesis about what they think will happen using the scientific method (grab this free poster outlining the steps they’ll need to follow!), collect and record data, then interpret their results and draw conclusions !
Box & Rubber Band Guitar
- Small shoebox or gift box (no lid required)
- Rubber bands of different widths
The Experiment:
- Have students sort through the rubber bands and arrange them so they’re stretched across the box from thinnest to thickest.
- Have students pluck each rubber band one by one like a guitar and record their observations.
- Students can then add a ruler set on its edge like a bridge across the rubber bands and pluck the bands again, recording observations.
This simple sound experiment teaches kids about sound waves as they learn that the thinner rubber bands produce higher pitches and shorter sound waves! The addition of the ruler helps them to understand how a dampener works to affect pitch.
Screaming Balloons
Balloons are a staple of STEM for teaching kids about static energy, but this sound experiment puts these handy party supplies to use to discuss another kind of energy!
- 2 packages of large balloons (at least enough for each of your groups of students and a few spares in case a balloon is popped)
- Hex nuts, pennies, marbles, and other small objects
- Have students place one of the small objects of their own choosing inside the balloon
- One student in the group should blow up the balloon about three-quarters of the way, and tie it off (they may need a bit of help with this)
- Students spin the balloon around in the air and record their observations
- Students then repeat the experiment with each of the small objects in different balloons.
Your students should make their own observations, but — spoiler alert — the hex nut will likely make a “screaming” noise as its six sides cause vibration across the balloon!
Have more balloon sound fun — download our sound science task cards for a buzzing balloons experiment and five more fun investigations.

Make Stick Harmonicas
Building their own instruments is a fun way to integrate project-based learning into your lessons, and making your own harmonica is a great way to learn more about sound waves.
- Plastic straws and paper straws
- Large popsicle sticks
- Wide rubber bands
- Smaller rubber bands
- Cut 2 1-inch pieces off of the straw.
- Stretch your wide rubber band length-wise around a large popsicle stick.
- Place a straw piece under the rubber band, close to the edge on one end.
- Place a second popsicle stick directly on top of the one that’s already rubber banded.
- Secure the sticks together at each end using the small rubber bands.
- Place the second straw piece in the middle of your new “harmonica” right between the sticks on the opposite end from the other. (Note: This straw piece should sit above the wide rubber band instead of below it.)
Students “play” their new harmonica by blowing into the straw pieces. To experiment with pitch, they can move the straw pieces around their instrument.
If you have paper straws, kids can replace their plastic straw pieces with paper ones, making predictions about whether or not they think the different material will affect the sound and recording their observations.
Some questions to ask:
- How did moving the straw pieces affect the sound?
- How did the different straw materials affect the sound?
Bonus: Have your students design their own musical instruments and put them together — like this fun coffee can and rubber band contraption!

Looking for more resources to teach about sound?
Teach Starter collaborator and Texas teacher Heather Chambers created these fun science center activities for third through fifth graders to determine different types of energy, including sound energy!
- Forms of Energy Task Cards
- Forms of Energy Sorting Activity
Or check out our full collection of elementary school science teaching resources !

30 Buzzing Facts About Bees to Excite Kids About Nature
Everyone benefits from the busyness of bees which is why these bee facts will help inspire your students to appreciate and protect them!

21 Epic Last Day of School Activities to Kick Off Summer Break
Looking for easy last day of school ideas for elementary or middle school? These quick and fun end of year classroom activities will help you finish off your year just right!

70 1st Grade Books to Add to Your Classroom Reading Corner This Year
Wondering which 1st grade books you should add to your classroom library? Look no further! We have a list of 70 that are teacher (and student) approved!

22 Fun Groundhog Facts to Share With Your Class on Groundhog Day
Need fun groundhog facts to share with your students this Groundhog Day? Find out what groundhogs eat, where they live and why we let them predict the weather!

How to Teach 1st Grade — The Ultimate Guide to What to Do, What to Buy and What to Teach
Looking for tips on teaching first grade? Our comprehensive 1st grade teacher guide will answer all your questions from what to buy to how to prepare for the first day of school and what to do throughout the school year.

10 Best Pencil Sharpeners for the Classroom — Recommended by Teachers
Need new pencil sharpeners in your classroom? We've rounded up 10 best pencil sharpeners recommended by teachers to get you started.
Get more inspiration delivered to your inbox!
Sign up for a free membership and receive tips, news and resources directly to your email!
Top 10 Sound Experiments: Fun & Easy
Sound, an intrinsic part of our lives, is more than just a medium for communication and entertainment. It is a fascinating scientific concept, offering insights into how energy travels and interacts with our environment.
This carefully curated selection is designed for learners of all ages, covering fascinating topics like vibration, sound waves, pitch, and resonance. These hands-on, educational experiments will not only amplify your understanding of the science of sound but also strike a chord with your innate curiosity.
We hope you enjoy this compilation of sound experiments and that it inspires you to continue exploring the wonders of science.
1. How to See Sound Experiment
The How to See Sound experiment is a fascinating way to explore the relationship between sound waves and visual patterns.
The How to See Sound experiment is a fun and insightful experience that is likely to pique your interest, whether you’re a scientific enthusiast, an artist, or just someone who enjoys discovering the wonders of the world around you.
2. Glass Bottle Xylophone
Seeking an innovative and entertaining technique to learn more about the science of sound? With the help of the Glass Bottle Xylophone experiment, students can build their own musical instrument and learn about the fundamentals of sound.
3. Singing Spoons
Do you want to learn more about the science of sound in a playful and imaginative way? Using just a few spoons, the Singing Spoons experiment is a fascinating and fun project that you should try.
4. Make a Straw Oboe
Make your own musical instrument by cutting a straw to a specific length and blowing across the top to create different notes. Experiment with different straw lengths to produce different pitches.
5. Create a Thunder Drum!
Creating a thunder drum is a unique and exciting way to explore the properties of sound and can help students understand these concepts in a more tangible way.
6. Musical Wine Glasses
The musical wine glass experiment is a fun and easy way to explore the science of sound and create your own musical instrument. By filling wine glasses with different amounts of water and tapping them with a spoon, you can produce a range of musical notes and create your own melodies.
7. Tuning Fork Resonance Experiment
The tuning fork experiment is an established representation of how resonance and frequency work in the study of sound.
Students can see and measure the effects of resonance and frequency in this experiment by experimenting with various objects and tuning forks of different frequencies.
A hands-on introduction to the fundamental concepts of sound and waves is provided by this simple yet interesting experiment.
8. The Doppler Effect with Sound
Through the use of sound waves generated by a moving sound source, students can investigate the Doppler effect in this experiment.
Students can learn about the Doppler effect and its use in disciplines like astronomy and radar technology through this exercise in an useful and fascinating way.
9. Soundproofing Experiment
Students can learn about the science of soundproofing and its importance in building pleasant and effective surroundings through this project, which is a practical and hands-on learning experience.
10. Standing Waves
With the help of this experiment, students can learn about the fundamentals of wave interference and resonance as well as how these ideas are used in real-world situations.
Similar Posts:
- 68 Best Chemistry Experiments: Learn About Chemical Reactions
- Top 100 Fine Motor Skills Activities for Toddlers and Preschoolers
- Top 58 Creative Art Activities for Kids and Preschoolers
Leave a Comment Cancel reply
Save my name and email in this browser for the next time I comment.
Cool Science Experiments Headquarters
Making Science Fun, Easy to Teach and Exciting to Learn!
Science Experiments
How to See Sound Science Experiment
What does sound look like? This fun 5-item science experiment helps kids “see” sound waves and have fun while doing it.
In this article, we include a demonstration video, a supplies list, detailed printable instructions, experiment variations, and an easy to understand scientific explanation of how it works.
Bonus: Kids love this experiment because not only are they allowed to make loud drumming noises, it’s required!

JUMP TO SECTION: Instructions | Video Tutorial | How it Works
Supplies Needed
- Plastic Wrap
- 1 teaspoon Uncooked Rice
- Metal Pan (Cookie Sheets or Pans are good options, but they must be metal)
- Metal Spoon
How to See Sound Lab Kit – Only $5
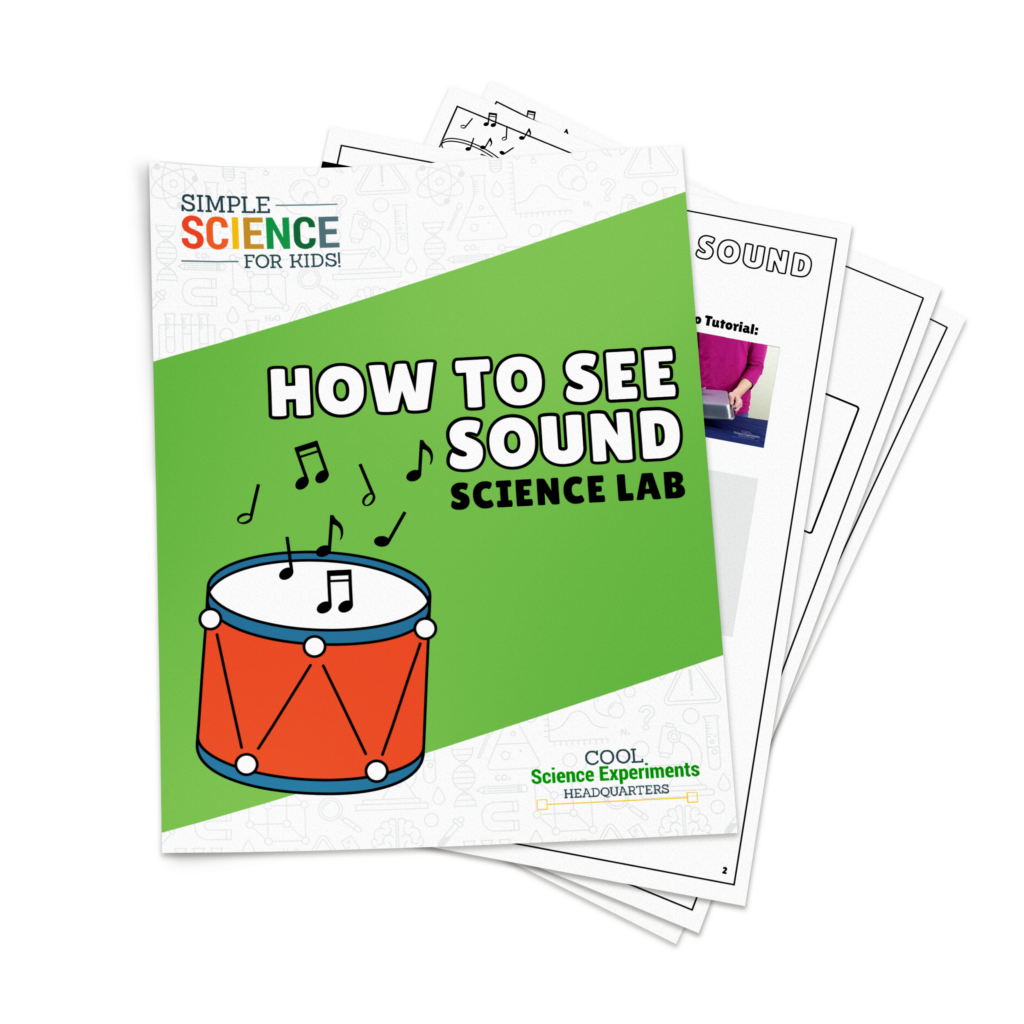
Use our easy How to See Sound Science Lab Kit to grab your students’ attention without the stress of planning!
It’s everything you need to make science easy for teachers and fun for students — using inexpensive materials you probably already have in your storage closet!
How to See Sound Science Experiment Instructions

Step 1 – Tear off a piece of plastic wrap big enough to cover the top of the bowl.
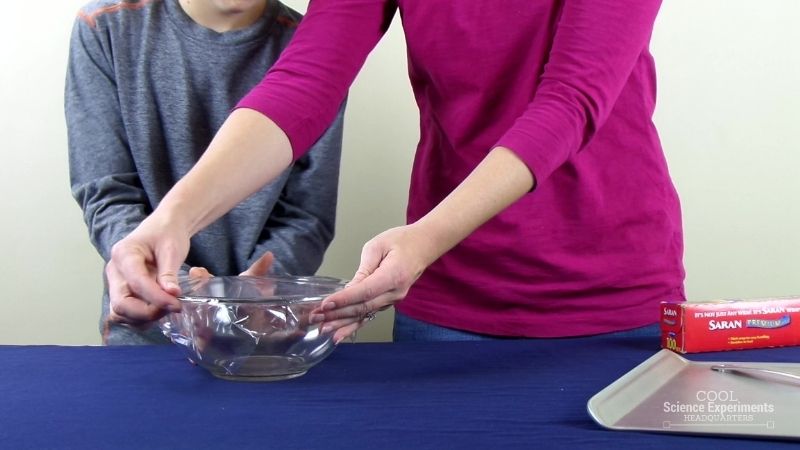
Step 2 – Secure the plastic wrap over the bowl. Make sure that the plastic wrap is very tight.

Step 3 – Pour 1 teaspoon of uncooked rice on the top of the plastic wrap.
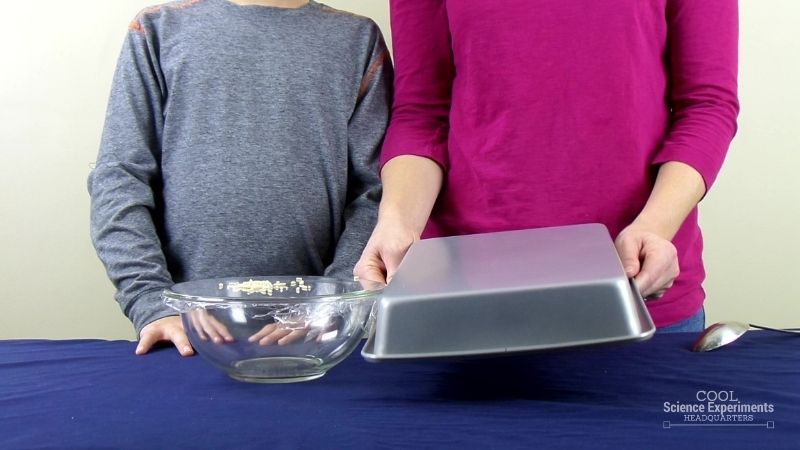
Step 4 – Hold the metal pan in the air and position it next to the bowl. What do you think will happen if you hit the pan with the spoon?
Helpful Tip: Remember, the pan must be metal or the experiment won’t work.
Step 5 – Take the metal spoon and bang on the metal pan like a drum and watch what happens to the rice. Write down your observations. Do you know the why the rice moved? Find out the answer in the how does this experiment work section below.
Video Tutorial
How to See Sound Science Experiment Step by Step Instructional Video
How Does the Experiment Work?
Sound is a disturbance that travels through a medium as a wave. In this experiment, when you hit the metal pan with the spoon, you disturb the particles of the pan causing them to vibrate. The vibrations in the pan are transferred to the air surrounding the pan, creating a sound wave.
When these sound waves reach the plastic wrap it disturbs the particles of the plastic wrap causing them to vibrate. These vibrations in the plastic wrap cause the rice to move. Sound waves traveling through the air are also what allow us to hear the noise of the spoon hitting the pan.
Other Ideas to Try
Try this experiment again, but change the distance of the pan from the bowl. As you move the pan farther away from the bowl, do the sound waves have the same effect on the rice grains?
I hope you enjoyed the experiment. Here are some printable instructions:

Instructions
- Tear off a piece of plastic wrap big enough to cover the top of the bowl.
- Secure the plastic wrap over the bowl. Make sure that the plastic wrap is very tight.
- Pour 1 teaspoon of uncooked rice on the top of the plastic wrap.
- Hold the metal pan in the air and position it next to the bowl
- Take the metal spoon and bang on the metal pan like a drum and watch what happens to the rice.

Reader Interactions

September 27, 2016 at 2:29 pm
I am trying to see the answer for the “Why can’t we see sound?” but I xan’t find it here. Can you help me, please?

February 2, 2017 at 11:37 pm
Invisible sound waves

May 21, 2019 at 9:57 pm
Sound is a vibration

March 12, 2017 at 10:15 pm
Because when you hit the tin it makes a hard and loud noise.

December 7, 2017 at 2:44 pm
This was an amazing experiment ever

January 31, 2018 at 5:08 pm
It is because the rice is having potential energy while it is on the wrap. Than and only then when you hit the pan is when it turns to kinetic energy.

October 31, 2018 at 8:56 pm
The sound waves bounce off the pan and travel to the drum. The drum vibrates and the rice jumps.

January 26, 2019 at 5:32 pm
Why can’t I get this to work
does the type of plastic wrap matter?

March 9, 2020 at 8:21 pm
it doesn’t work for me too 🙁
Leave a Reply Cancel reply
Your email address will not be published. Required fields are marked *
Save my name, email, and website in this browser for the next time I comment.

- Privacy Policy
- Disclosure Policy
Copyright © 2024 · Cool Science Experiments HQ

7 Cool Sound Science Experiments for Kids
Nov. 19, 2018
When it comes to science experiments, some of the most enjoyable involve the science of sound. If you’re looking to dazzle your little learner with exciting new experiments, look no further than simple sound science experiments that use everyday household items to bring sound to life. Let’s explore 7 riveting ideas to discover the science behind sound! Watch educational videos with scientific experiments and show them to your child.

The Classic Paper Cup and String Phone
A much-loved childhood project, the paper cup phone is much more than a fun and old-fashioned way for kids to communicate throughout the house. This elementary sound science project shows kids how sound waves can travel through a string and be converted back to audible sound at the opposite end.
Supplies Needed:
- 2 paper cups
- Long string, like fishing line, kite string
- A sharp pencil or needle to poke holes in the cups
What to Do:
1. Start by cutting a long piece of string of at least 50 feet.
2. Poke a small hole at the bottom of each cup.
3. Using each end of the string, thread it through the bottoms of the cups, tying a large knot so that the string does not fall out of the cup. If you make the holes too large, use a washer or paper clip to hold the string in place so that it does not pull out of the cup.
4. Move into position and encourage your child to move away from you so that the string is far enough to make it tight. Be sure that the string does not touch any other object and that it remains suspended in air as you complete the experiment.
5. Taking turns, talk into the cup, while the other person listens by putting the cup to their ear. Tell your child to repeat what he or she hears after you have spoken and do the same in return!
After the experiment, explain to your child what is happening: sound waves created by talking through the cup travel through the line to the other end, converting back to sound on the opposite side!
Make Music with a Straw Pan Flute
Perfect for younger children, the following sound waves experiment not only involves creating a fun musical instrument your child could play with, but teaches kids how length can affect the pitch of sound waves.
Supplies Needed:
- At least 9 or 10 straws, more if desired!
- Clear gift wrap tape
1. Take the straws and line them up side-by-side and cut them at an angle at the top.
2. Tape the straws together to make a pan flute.
3. Instruct your child to blow through the straws. Which straws make higher and lower pitches? Why?
Feel free to use more straws and experiment with different lengths to produce different pitches and sounds! Ask your child to explain what happens to the sound the shorter a straw is cut, and create double pan flutes to make harmonies to further explore how length alters the pitch.
Listen to Sounds Travel Underwater
Sound travels well through air, but it travels even better through water! This easy sound experiment for kids can be done in a jiffy out on the back porch.
- A bucket filled with water
- A large plastic water or soda bottle
- At least 2 kitchen knives
- Scissors or sharp knife to cut the bottle
1. After filling the bucket with water, take a sharp knife or kitchen shears and help your child cut off the bottom of the plastic water bottle. Be sure that the cap is taken off of the bottle.
2. Instruct your child to place the bottle in the water so that the cut bottom is in the water. Your child will then put his or her ear to the top of the bottle to listen.
3. Using the kitchen knives, clang them together to make a sound, but do this in the bucket as your child is listening. What does your child hear?
Your child has probably noted that the sound of the clanging is loud and clear. Water travels faster through water than in the air, and animals that live underwater are able to hear sound clearly. Discuss the results with your child, to teach him or her more about the conduction of sound waves through water.
See the Sound
Sound vibrations travel through air, water, and even solid objects, but it’s not possible to see the waves. What if we could see the waves in another way? This science of sound experiment makes sound more visible by forcing objects to react to the sound vibrations.
- Empty clear mixing bowl
- Plastic wrap
- Large rubber band
- Sugar crystals- Sugar in the Raw works great, or make sugar crystals in another science experiment!
1. Wrap a sheet of plastic wrap over the mixing bowl so that it’s taut, and secure with the large rubber band. Be sure that the plastic wrap is tight and does not sag.
2. Place a few of the sugar crystals on the top of the plastic wrap, placing them in the middle of the wrap.
3. Instruct your child to get close to the sugar crystal and say something loudly! What happens to the crystals? Do they move?
4. Experiment with louder and softer words or sentences to watch the sugar crystals react to the sound vibrations!
While your child might think it’s his or her breath making the crystals jump and move, but it’s actually the sound vibrations. Try different sounds besides ordinary speech and see how the crystals come to life!
Make a Stick Harmonica
Making musical instruments are easy and fun, and they teach kids about sound waves and pitch. This experiment is much like the pan flute above, but kids can alter the pitch by sliding the straws without reassembling the harmonica.
- 2 large craft sticks
- 1 wide rubber band
- 2 smaller rubber bands
- 1 plastic drinking straw
1. Using the scissors, cut the straw into 2 one-inch pieces and set aside.
2. Take the wide rubber band and stretch it length-wise around one of the jumbo craft sticks and place one of the straw pieces under the rubber band, close to the edge on one end.
3. Take the other craft stick and place it directly on top of the craft stick with the rubber band. Secure them together at the ends using the small rubber bands.
4. Finally, take the last piece of straw and place it in the harmonica between the sticks on the opposite end from the other, but this piece should be fit above the wide rubber band instead of below it.
5. Encourage your child to play the harmonica by blowing in the center of the harmonica! Explore different pitches by moving the straw pieces!
After playing the harmonica, don’t forget to complete the sound experiment by talking about the mechanics of the harmonica. The vibrating rubber band makes all the noise, and the closer the straw pieces are to the center of the harmonica, the higher the pitch will be due to the shortened length of the band!
Experimenting with Sound Waves
It might be hard to imagine that sound waves can travel through solid objects as well as through the air. This simple but exciting sound waves science activity will demonstrate for your child how sound can and does indeed travel through solid objects!
- Metal kitchen spoon- a large metal measuring spoon works great!
- At least 30 inches of kite string
1. Stretch out the string and tie the handle of the spoon in the middle of the string.
2. Take one end of the string and tie around your child’s pointer finger. Do the same using the other end, but tie this string around the pointer finger of your child’s opposite hand.
3. Instruct your child to put his or her fingers, with the string wrapped around each, into their ears.
4. Help your child lean over so the spoon dangles and help him or her swing the spoon so it hits a nearby door or wall.
5. Hit the door or wall again, but this time with more force. What does your child hear?
Your child should hear a bell-like sound travel up the string from the spoon and into their ears. Discuss with your child how the sound waves created from the spoon hitting the door moves through the string until he or she is able to hear it!
Xylophone Water Jars
Musical instruments are so much fun to make! This sound activity teaches children how varying levels of water in containers change the pitch of the sound created.
- 4 empty and clean baby food jars
- 4 different colors of food coloring
1. Help your child fill each jar with varying amounts of water.
2. Add a few drops of food coloring to each jar.
3. Using the mallet, instruct your child to firmly tap the outside of each jar. What sounds are being made? Which jars have the highest or lowest pitch?
Encourage your child to hypothesize why some jars emit a lower sound, while others are higher. Play around with the water levels in each jar and experiment with pitch!
Learn Science with Kids Academy Classroom!
Use this interactive Classroom by Kids Academy called Sound is All Around Us to teach first graders the basics of sound science. OPEN THE CLASSROOM .

After clicking "Next", you'll find a set-up lesson with an educational video, accompanied by practice worksheets and summary quiz to help kids better understand and remember the learned material.
Equipped with our extensive learning resource library, Kids Academy Classroom allows teachers and parents to create lessons and share them with the young smarties in a couple of clicks.
Go directly to the Classroom page and create a quick classroom on any topic you want! After students complete the lesson, you'll get access to a report about their performance. Check out our Classroom Guide article for more information!
Now that you have 7 cool ideas for exciting sound science experiments, it’s time to get started! Your child will love learning all about the science of sound and the endlessly fascinating ways sound waves can travel through air, water, and objects. Don’t forget to check out our science worksheets and activities to supplement your child’s learning in between all your child’s experiments!
Related Articles

Cancel anytime
You'll be able to manage the favorite spreadsheets list.
You’ll be able to hide/mark the accomplished tasks.
- School / District Account
- Family Account
- 2 PDF worksheets per day
- Interactive worksheets
- Targeted ads
- KidsAcademy ads
$ 1.99 / month
- Printable and interactive worksheets
- Learning videos
- Ad-free browsing

- Engage students and save time with ready-to-use premium educational activities.
- Unlimited Learning Library access
$9.99 / month

Andrea Knight
Teacher · Learner · Author
Sound Experiments

This science unit is so fun. It’s loaded with my favorite sound experiments, like this one. I first saw this idea in a library book and, to be honest, I didn’t expect it to be that big of a deal (or even work, if I’m still being honest). But to my surprise, it actually delivered. I think I suffer from Pinterest-Fail PTSD.
Singing Spoons is a fun way to show kids how volume and pitch change depending on whether sound waves are traveling through the air or through a solid, similar to the way a stethoscope works. It’s one of our favorite sound experiments and is pretty easy to set up. Just use tape to connect three metal spoons to a piece of string or yarn. Then, jiggle the string so the spoons swing into one another and observe the sound they make. It should sound dull and tinny. Next, wrap the ends of the string around your fingers as if you were going to floss your teeth. Place only the yarn-wrapped fingers in your ears (again, think of a stethoscope) and swing the spoons again. Notice how the pitch and volume change.
Even the adults in my house thought this was cool. And one of them is fairly hard to impress.😉

This experiment can easily be done without these sheets👇, but I like reading procedural and informational texts with my students and I also like having a place for them to record their own ideas during investigations.

More Sound Experiments
Hands down, the most satisfying part of planning this science unit was finally engineering a harmonica that actually works! I’m not exaggerating when I tell you how much we were geeking out over this one… maybe because it was our third attempt. But I guess that’s the nature of science experiments, right? In the one pictured below, changing the distance between the pink straws changes the pitch of the sound. Shorten the gap and the pitch will rise. Spread them back out and the sound will become lower. It’s all about vibrations and sound waves .
And the bee?🐝 If you swing it like a lasso above your head, it really does buzz! It’s another fun way to teach your students that vibrations cause sound.

I created student recording sheets for these sound experiments, as well as procedural posters (with picture support) and kid-friendly explanation sheets. These explanations help young children understand the science they’re observing, but I also like how they give families an age-appropriate context to build from when they want to talk to their kids about science.

Making a sound wave model takes some time, but the wow factor can’t be denied! You only need three things to make your model: duct tape, wooden skewers, and clay. NOTE: To save time, we built ours using jellybeans, but I think the weight of the clay would provide an even better result. If you use clay, roll each ball to roughly the size of a large grape.

Nonfiction Science Text
I have a hard time finding science material my first-graders can actually read, so it has become my habit to just write our own. It’s a win-win really because then I have a paper copy for each of them. By having their own, we can not only read it together, but the kids can practice it independently and even take it home to share with their families. The books serve double-duty during reading and phonics instruction, too. We can highlight key vocabulary words, find and circle word wall words, and even personalize the interactive pages.
This science book, What Is Sound? , introduces children to the concept of sound and how it behaves. Key science vocabulary such as pitch , volume , vibrate , and echo are emphasized in the text.

Key Vocabulary Posters
There are some pretty BIG words for some pretty young kids in this science unit, so I created a set of posters to help the children understand and remember them. Each poster features the key science term, a colorful graphic, and a kid-friendly definition. The set includes 8 different posters for the following vocabulary words:
- communicate

Key Word Game Cards
Mini-versions of the key word posters have been included in the resource. Originally, I just intended to use them as cards in a “Memory” style game, but they’re also good for student-pairing activities and vocabulary review. There are nine pairs of words in the set: sound, waves, vibrate, volume, pitch, echo, ear, communicate, and loud .

Student Worksheets
I also included some additional worksheets to help support science instruction and provide a connection to other subject areas, such as writing and phonics.
You can preview more of this first grade science unit👉 HERE . It includes printable materials for teaching children the science behind light and sound, as well as how we use both to communicate with others.
Science Ideas on Pinterest
Even though I teased about a Pinterest-Fail at the beginning of this post, I do love Pinterest. (I have discovered though, if it looks too good to be true, it probably is.😂) If you’re planning a science unit on the study of light and sound, click over to my Pinterest board: Light and Sound Science . I’ve added pins that lead to great ideas for supporting your instruction. You’ll find science videos, book suggestions, integrated projects, and more.

Recommended Book List
Check your school or local library for titles to support your science instruction. These are some of the books I’ve used for read-alouds and to help build my own background knowledge as I planned the unit.
- Sounds All Around by Wendy Pfeffer
- How Sound Moves by Sharon Coan
- How Does Sound Change? by Robin Johnson
- Oscar and the Bat by Geoff Waring
- The Listening Walk by Paul Showers
- Sending Messages with Light and Sound by Jennifer Boothroyd
CLICK👇TO PREVIEW THE RESOURCE

LIGHT AND SOUND SCIENCE UNIT
Happy teaching!
MORE SCIENCE POSTS FOR 1ST GRADE

In the Loop
- Skip to primary navigation
- Skip to main content
- Skip to primary sidebar
Teaching Expertise
- Classroom Ideas
- Teacher’s Life
- Deals & Shopping
- Privacy Policy
Waves Activities For Middle School: Observations, DIYs, Experiments, And Worksheets
March 19, 2024 // by Nicole Muir
Science teachers this one’s for you- teach your students about wave speeds, electromagnetic waves, light waves, and a whole lot more! Science can easily become one of the students’ favorite subjects in school. If your students are naturally curious and want more experiments during class time, you can check out our list of 15 waves activities for middle school for some awesome ideas.
1. Physical Body Observations
Students will be impressed and amazed when they conduct this experiment because they will learn that their bodies can make waves. It’s a wonderful activity for teaching them about wave basics. What’s even better is that this activity can be used as a starting point for extension activities in the future.
Learn More: UVM.edu
2. Rubber Band Guitar
Students can learn about different kinds of waves by building their very own musical instruments. Interactive activities like this one are excellent because the hands-on nature of these tasks with helping them remember the lessons for months to come.
Learn More: Science Buddies
3. Waves Properties Cut and Paste Worksheet
This activity is perfect for elementary and early middle school students. The cut-and-paste nature of this activity will allow students to demonstrate their understanding of the lessons covered. Either complete this as an independent activity or follow it up with task cards.
Learn More: Twinkl
4. Visible Sound Vibrations
If you’re looking for an easy-to-organize activity that doesn’t require hours of lesson prep, this one’s for you! This visible sound vibration activity is an awesome resource and provides the perfect opportunity for students to define key terms that they are working with.
Learn More: Extended Notes
5. Spectrogram
This website allows students to work with and manipulate both basic and complex science concepts. Whether you are a full-time or part-time teacher, this website is an excellent resource for your students to work with.
Learn More: Spectrogram
6. Hearing Test
This digital resource is an awesome resource for you to access. You and your students might be surprised at the results of this activity. Interactive resources will help the information resonate with your students more effectively.
Learn More: Dosits
7. Kazoo Drum
Learn about sound and resonance with this DIY Kazoo drum task. This task can help learners develop a deeper understanding of wave properties. Having one end of the tube covered creates a buzzing sound that is heartfelt. Have students name the type of wave as they go!
8. Energy and Waves
Analyzing wave properties through visual demonstrations can help teach students about wave motions. You only need a few supplies to make this happen today! Simply gather together a container, a few ping-pong balls, and water to get started.
Learn More: Generation Genius
9. Science Stations
The possibilities for fun activities are endless when you set up a science station. Customize your stations to teach students about the behavior and categories of waves, as well as the concepts of wave frequency, and a whole lot more!
Learn More: What I Have Learned Teaching
10. Slink-o-Scope
Using a slinky spring, meter ruler, rubber band, and a few more simple items, you can arrange a demonstration for your students that teaches them about sound waves. Although Longitudinal waves are at the heart of this experiment, be sure to explain where to find the horizontal and vertical axes as well.
Learn More: Beta.iop.org
11. Slinky Sound Experiments
Did you know that your can repurpose your old slinkies to demonstrate science concepts? This experiment provides a visual for students to focus on in order to help them gain a deeper understanding of the scientific concepts being covered within a particular lesson.
Learn More: Teaching Ideas
12. Water Whistles
Learn about sound by showing the students a powerful science demonstration. Using just a few simple and inexpensive materials that you probably have in your classroom or house, you can pull off this demonstration in your next science lesson.
Learn More: My Baba
13. Vibrations and Waves With Salt
After you cut off the neck of a balloon, stretch it over the opening of a plastic cup and sprinkle a little bit of salt over the top. You will play loud music right beside the cup setup. As you do so, your students will witness the salt bounce up and down and “dance” around!
Learn More: Frugal Fun 4 Boys
14. Oobleck Science Activity
Some students are obsessed with slime and oobleck. This project demonstrates the behavior of waves. The membrane on the device helps to transmit sound from the air into the tube right to the oobleck.
Learn More: Brave The Elements
15. Dancing Sprinkles
The main focus of this experiment is sound, motion, and vibrations. This inquiry activity involves a cup, cling wrap, rubber band, some sort of granular material, and a large plate. Explain that sound causes materials to vibrate. The sounds that students produce will cause vibrations that move the sprinkles.
Call Today:
(727) 822-1555, shockwave therapy.
Shockwave therapy is increasing in popularity among doctors and patients as a treatment for chronic pain and limited mobility. Here, we’ll review key points about shockwave therapy to learn how it may help you heal from pain or injury.
What is Shockwave Therapy?
Shockwave therapy is a safe and non-invasive treatment method for pain and limited mobility. It’s a multifaceted therapy method used in orthopedics, sports medicine, physical therapy, and urology.
Shockwaves are sound wave pulsations. In shockwave therapy, a device is used to transfer energy to the treatment area. The shockwaves are absorbed by the body in the targeted treatment area to promote healing.
How Does Shockwave Therapy Work?
Shockwave therapy works by delivering energy in high levels to bodily tissues. Once transmitted to the area in need of treatment, the energy stimulates the body’s natural healing process. Specifically, shockwave energy can initiate the body’s natural repair and regeneration processes to heal damaged soft tissue, including bones and tendons, without the need for surgery.
In shockwave therapy, energy is delivered to the body with an applicator. Through the use of compressed air, a projectile within the applicator produces kinetic energy. That energy moves to the transmitter at the tip of the applicator, which then delivers the energy to the injured tissue.
The high energy spike delivered by shockwaves speeds up tissue repair, spurs new cell growth, and promotes blood flow. Shockwave energy also increases mast cell activity, one of the most important factors in the body’s inflammatory response. With greater mast cell activity from shockwave therapy, the body will have a more effective inflammatory process for healing and regeneration.
Shockwave therapy speeds up collagen production in the body. New collagen fibers will add density to tendons for greater strength and injury prevention.
What Can Shockwave Therapy Be Used For?
Since shockwave therapy makes use of a small applicator to transmit acoustic waves to the body, it can be used to target a wide range of injuries and conditions. Common applications for shockwave therapy include:
- Jumper’s knee
- Shoulder pain
- Tennis elbow
- Heel spurs
- Tendinopathy
- Medial tibial stress syndrome
- Calcifications
As a non-invasive and highly effective treatment method for numerous applications, shockwave therapy could help you heal from chronic pain or injury. Contact Rubin Chiropractic Health Center in St. Petersburg today to learn more about shockwave therapy.
Accessibility
Accessibility modes, online dictionary, readable experience, visually pleasing experience, easy orientation, accessibility statement.
- rubinhealthcenter.com
- September 11, 2024
Compliance status
We firmly believe that the internet should be available and accessible to anyone, and are committed to providing a website that is accessible to the widest possible audience, regardless of circumstance and ability.
To fulfill this, we aim to adhere as strictly as possible to the World Wide Web Consortium’s (W3C) Web Content Accessibility Guidelines 2.1 (WCAG 2.1) at the AA level. These guidelines explain how to make web content accessible to people with a wide array of disabilities. Complying with those guidelines helps us ensure that the website is accessible to all people: blind people, people with motor impairments, visual impairment, cognitive disabilities, and more.
This website utilizes various technologies that are meant to make it as accessible as possible at all times. We utilize an accessibility interface that allows persons with specific disabilities to adjust the website’s UI (user interface) and design it to their personal needs.
Additionally, the website utilizes an AI-based application that runs in the background and optimizes its accessibility level constantly. This application remediates the website’s HTML, adapts Its functionality and behavior for screen-readers used by the blind users, and for keyboard functions used by individuals with motor impairments.
If you’ve found a malfunction or have ideas for improvement, we’ll be happy to hear from you. You can reach out to the website’s operators by using the following email
Screen-reader and keyboard navigation
Our website implements the ARIA attributes (Accessible Rich Internet Applications) technique, alongside various different behavioral changes, to ensure blind users visiting with screen-readers are able to read, comprehend, and enjoy the website’s functions. As soon as a user with a screen-reader enters your site, they immediately receive a prompt to enter the Screen-Reader Profile so they can browse and operate your site effectively. Here’s how our website covers some of the most important screen-reader requirements, alongside console screenshots of code examples:
Screen-reader optimization: we run a background process that learns the website’s components from top to bottom, to ensure ongoing compliance even when updating the website. In this process, we provide screen-readers with meaningful data using the ARIA set of attributes. For example, we provide accurate form labels; descriptions for actionable icons (social media icons, search icons, cart icons, etc.); validation guidance for form inputs; element roles such as buttons, menus, modal dialogues (popups), and others. Additionally, the background process scans all the website’s images and provides an accurate and meaningful image-object-recognition-based description as an ALT (alternate text) tag for images that are not described. It will also extract texts that are embedded within the image, using an OCR (optical character recognition) technology. To turn on screen-reader adjustments at any time, users need only to press the Alt+1 keyboard combination. Screen-reader users also get automatic announcements to turn the Screen-reader mode on as soon as they enter the website.
These adjustments are compatible with all popular screen readers, including JAWS and NVDA.
Keyboard navigation optimization: The background process also adjusts the website’s HTML, and adds various behaviors using JavaScript code to make the website operable by the keyboard. This includes the ability to navigate the website using the Tab and Shift+Tab keys, operate dropdowns with the arrow keys, close them with Esc, trigger buttons and links using the Enter key, navigate between radio and checkbox elements using the arrow keys, and fill them in with the Spacebar or Enter key.Additionally, keyboard users will find quick-navigation and content-skip menus, available at any time by clicking Alt+1, or as the first elements of the site while navigating with the keyboard. The background process also handles triggered popups by moving the keyboard focus towards them as soon as they appear, and not allow the focus drift outside it.
Users can also use shortcuts such as “M” (menus), “H” (headings), “F” (forms), “B” (buttons), and “G” (graphics) to jump to specific elements.
Disability profiles supported in our website
- Epilepsy Safe Mode: this profile enables people with epilepsy to use the website safely by eliminating the risk of seizures that result from flashing or blinking animations and risky color combinations.
- Visually Impaired Mode: this mode adjusts the website for the convenience of users with visual impairments such as Degrading Eyesight, Tunnel Vision, Cataract, Glaucoma, and others.
- Cognitive Disability Mode: this mode provides different assistive options to help users with cognitive impairments such as Dyslexia, Autism, CVA, and others, to focus on the essential elements of the website more easily.
- ADHD Friendly Mode: this mode helps users with ADHD and Neurodevelopmental disorders to read, browse, and focus on the main website elements more easily while significantly reducing distractions.
- Blindness Mode: this mode configures the website to be compatible with screen-readers such as JAWS, NVDA, VoiceOver, and TalkBack. A screen-reader is software for blind users that is installed on a computer and smartphone, and websites must be compatible with it.
- Keyboard Navigation Profile (Motor-Impaired): this profile enables motor-impaired persons to operate the website using the keyboard Tab, Shift+Tab, and the Enter keys. Users can also use shortcuts such as “M” (menus), “H” (headings), “F” (forms), “B” (buttons), and “G” (graphics) to jump to specific elements.
Additional UI, design, and readability adjustments
- Font adjustments – users, can increase and decrease its size, change its family (type), adjust the spacing, alignment, line height, and more.
- Color adjustments – users can select various color contrast profiles such as light, dark, inverted, and monochrome. Additionally, users can swap color schemes of titles, texts, and backgrounds, with over seven different coloring options.
- Animations – person with epilepsy can stop all running animations with the click of a button. Animations controlled by the interface include videos, GIFs, and CSS flashing transitions.
- Content highlighting – users can choose to emphasize important elements such as links and titles. They can also choose to highlight focused or hovered elements only.
- Audio muting – users with hearing devices may experience headaches or other issues due to automatic audio playing. This option lets users mute the entire website instantly.
- Cognitive disorders – we utilize a search engine that is linked to Wikipedia and Wiktionary, allowing people with cognitive disorders to decipher meanings of phrases, initials, slang, and others.
- Additional functions – we provide users the option to change cursor color and size, use a printing mode, enable a virtual keyboard, and many other functions.
Browser and assistive technology compatibility
We aim to support the widest array of browsers and assistive technologies as possible, so our users can choose the best fitting tools for them, with as few limitations as possible. Therefore, we have worked very hard to be able to support all major systems that comprise over 95% of the user market share including Google Chrome, Mozilla Firefox, Apple Safari, Opera and Microsoft Edge, JAWS and NVDA (screen readers).
Notes, comments, and feedback
Despite our very best efforts to allow anybody to adjust the website to their needs. There may still be pages or sections that are not fully accessible, are in the process of becoming accessible, or are lacking an adequate technological solution to make them accessible. Still, we are continually improving our accessibility, adding, updating and improving its options and features, and developing and adopting new technologies. All this is meant to reach the optimal level of accessibility, following technological advancements. For any assistance, please reach out to

UAE student blinded after classmate threw pen gets 80% eyesight restored
The severity of the injury caused a deep corneal tear and a traumatic cataract, which posed a risk of life-long blindness.

Nasreen Abdulla
- Follow us on

Top Stories

UAE announces 2-month grace period for residence visa violators

UAE announces fee refund for tax service charges from August 1

Paid parking in Dubai: Residents face up to Dh4,000 extra yearly costs when new rates kick in

Published: Wed 11 Sep 2024, 8:40 AM
Last updated: Wed 11 Sep 2024, 10:16 PM
When 15-year-old Dhikshit Anoop's mother, Greeshma Anoop, got a call about her son's eye injury in school, she thought he might have to take eye drops for a few days.
However, she was unaware that her son had been blinded and it would need two surgeries and months of treatment to restore his sight partially.
The student was struck in the right eye when his classmates were throwing ballpoint pens across the classroom. The severity of the injury caused a deep corneal tear and a traumatic cataract, which posed a risk of life-long blindness.
Dhikshit went to the hospital about 4-5 hours after the incident. “When he first came to the hospital, his eye was in a terrible condition,” Dr Parth Hemantkumar Joshi, ophthalmologist at Aster Hospital Mankhool, told Khaleej Times . “His cornea, lens and vitreous were injured. We informed the parents about the nature of the injury, the required treatment in a two-staged approach and a relatively long recovery period of around four to six months with visual rehabilitation.”
Stay up to date with the latest news. Follow KT on WhatsApp Channels.
The development of a cataract following such an injury is common, occurring in up to 60 per cent of severe open eye injuries.
Within the next few hours, Dhikshit underwent the first surgery to put stitches in his eye. “The first step was to close the wound to prevent further infection and potential loss of sight, so we secured it with stitches thinner than human hair,” said Dr Parth. “It was done under general anaesthesia and took around 45 minutes to complete.”

Dhikshit was then allowed to go home and the stitches were allowed to heal for more than a month. Greeshma said that the recovery period was one of the toughest that the family encountered.
“Dhikshit is a football player, and I would hardly see him at home for more than half an hour,” she said. “But during this time, he was not allowed to go out, play sports, or lift heavy things. Luckily, the doctor allowed him to watch TV. I would download some movies and series for him. He was not a big movie fan but now he enjoys it. My younger son is four years old. He would try to be with Dhikshit and cheer him up all the time.”
Once the stitches were healed, the teenager went back for his second surgery. “After the eye was stabilised, we undertook the second, more definitive procedure,” said Dr. Parth. “During this, all the damaged structure of the eye, like the lens and the vitreous, were removed and replaced. The procedure took a little over an hour. Eventually we could save up to 75 to 80 per cent of his eyesight, which was an excellent outcome considering that he had zero vision in the right eye when he came in.”
Dr Gazala Hasan Mansuri, an ophthalmologist who assisted in the case, said: “Whenever there is a traumatic injury, it is of utmost importance to manage it in time,” she said. “Any exposure to infection could be disastrous in such cases."
Greeshma said that the family counted themselves lucky to have found the team of doctors. “Dr Parth explained each procedure in detail at every step of the way,” she said. “We had briefly considered going back to India for the procedure, but we felt like we could trust Dr Parth.”
She also credited Dhikshit for being strong throughout the ordeal. “We were shattered, to be honest,” she said. “But he was really cool about it and that gave us some strength. He would not even let us take time off work to stay with him at home. He said that us parents being home and stressing about him would stress him out so we hardly took any leave. He was also on-time with his medication, eye care and doctor visits.”
On Monday, the teenager went back to school. “His teachers and friends were happy to have him back,” said Greeshma. “His teacher said his entire class had fallen silent after the incident. He is happy to be back, but he is heartbroken because he will have to miss playing for the under-15 football tournament in school in October."
According to Dr Parth, Dhikshit will have to wear glasses due to the incident, even though he did not need any before that. “The corneal shape was altered because of the injury,” he said. “The eyesight is continuing to recover. Vision is up to 80 per cent now and we are hoping that over the next few months, it will improve."
- UAE: Many students spend up to 3 hours in school bus commute; doctors warn of health issues
Anonymous reports, peer support: How UAE schools tackle bullying
- UAE: How pet-friendly schools are helping students beat anxiety, shyness
- Newsletters

More news from UAE
Uae president receives philippines interior secretary, discusses bilateral cooperation.
Sheikh Mohamed also extended his greetings to Ferdinand Marcos Jr, the president of the Philippines
uae 1 day ago -->
UAE: 90% movie-goers click on free popcorn link as phones get 'hacked' in social experiment
Authorities have urged residents to report suspicious links or emails related to their bank accounts to their respective bank’s call centre and Dubai Police
Dubai: New interactive game room to launch this month
Originally founded in Winnipeg, Activate currently operates over 30 locations in Canada and the US
Dubai: Dh150 million construction contract awarded for 'South Living' project
The project is expected to be completed by Q1 2027 and will feature 209 units, including studios, 1-, 2-, and 3-bedroom apartments
UAE President welcomes King of Bahrain on arrival in Abu Dhabi
Other senior officials were also present to receive the Bahraini King
Fixed-term exclusions are considered for severe, persistent cases of bullying, say UAE school heads
UAE: No, the flu vaccine won’t give you the flu, clarifies top health official
Some individuals misinterpret the common side-effects of the shot as those of flu, he said
UAE: Is too much screen time causing 'virtual autism' among children?
UAE-based specialists have raised concerns about the impact of digital overexposure on children's development
Type your keywords
- Quick Facts
- Sights & Attractions
- Tsarskoe Selo
- Oranienbaum
- Foreign St. Petersburg
- Restaurants & Bars
- Accommodation Guide
- St. Petersburg Hotels
- Serviced Apartments
- Bed and Breakfasts
- Private & Group Transfers
- Airport Transfers
- Concierge Service
- Russian Visa Guide
- Request Visa Support
- Walking Tours
- River Entertainment
- Public Transportation
- Travel Cards
- Essential Shopping Selection
- Business Directory
- Photo Gallery
- Video Gallery
- 360° Panoramas
- Moscow Hotels
- Moscow.Info
- Museums of Science and Technology
Opened in 2006, and billing itself as "the first Oceanarium in Russia", this collection of exotic and tropical fish and other marine creatures is part of a shopping centre in the centre of St. Petersburg, close to Vitebsky Station. There are 33 aquariums in the display, containing nearly 150 species of fish, sea mammals, and other sea creatures. The attractively designed aquariums are divided into zones by environment (tropical, reef, etc.), with an ambient soundtrack and themed decorations. There are also shows with seals (Tuesday to Sunday, 11.30am and 4pm) and sharks (Tuesday to Sunday, 7pm), and the chance to watch the animals being fed. There is also a diving school attached to the Oceanarium.
| Location: | 86, Ulitsa Marata |
|---|---|
| Metro: | Zvenigorodskaya |
| Telephone: | +7 (812) 448-0077 |
| Open: | Daily from 10am to 10pm (ticket office to 9.15pm) |
| Closed: | Last Monday of every month |
| Website: | |
| Admission: | Adult: RUB 450.00. Students/children: RUB 250.00 |
| Photo and video: | Photo: RUB 200.00 Video: RUB 500.00 |
| Accessibility note: | Full wheelchair access is available, with elevators/lifts and ramps. |
St. Petersburg High
Achieving Excellence
- School Information
- Principal's Weekly Message
- School Staff
- Devil's Doings Newsletter
- Green Devil's Pantry & Closet
- Palmetto and Pine Student Newspaper
- Parents Information
- Bookkeeping
- Food Service
- School Financial Reports
- School Improvement Plan (SIP) District
- Curriculum Guide
- Advanced Placement Classes
- Course Registration Resources
- Testing Calendar
- Air Force Junior ROTC
- Center for Construction Technologies
- International Baccalaureate (IB)
- 3DE Program by Junior Achievement
- SAVE Promise Club
- Sports & Club List
- Club Handbook
- National Honor Society
- Freshman Class
- Sophomore Class
- Junior Class
- Senior Class
- Anti Bullying/Harassment
- Florida Kid Care
- Hygiene Resources
- Mental Health Matters
- The Green Devil Librarian
- Uniform Statewide Assessment Calendar
- School Shirts
- Palmetto & Pine News
- School Advisory Council
Site Shortcuts
- 2024-2025 Homerooms
- ACT Test Dates
- Advanced Academics SPHS
- Alumni Information
- Apply To AVID Online
- Exam Policy FAQs
- Financial Aid and Scholarships
- Information on PSAT and SATpractice.org
- Khan Academy
- Library Media and Instructional Materials
- Link to Student Accident Insurance
- Parents - Things You Should Know
- Principal's Weekly Message
- Report Bullying
- Report Safety Concerns
- SAT Test Dates
- Schedule Corrections (Traditional Students)
- Scholarship Information
- School Improvement Plans
- Staff Directory
- Student Registration
- Transportation
Welcome to St Petersburg High School Home of the Green Devils
2501 5th Avenue North St. Petersburg, FL 33713 (727) 893-1842 Fax (727) 893-1399 Guidance Fax (727) 893-5542 School Hours - 7:25 to 1:55
Headlines & Features

Alumni credit mom as inspiration for becoming doctors
Fall volleyball information, summer football workout schedule, congratulations national merit finalists, buy a brick. leave your legacy, tech tips for students, upcoming events.
Underclass Picture Day
6:00 PM Open House
September 23, 2024
No school for students - Possible hurricane make-up day if needed
Teacher Planning Day - Non-Student Day
Peachjar eFlyers
Senior obligations and online payments.
2501 5th Ave N , St. Petersburg, FL 33713
(727) 893-1842
(727) 893-1399
- Questions or Feedback? |
- Web Community Manager Privacy Policy (Updated) |
IMAGES
VIDEO
COMMENTS
18. Blocking Noise. In the Block That Noise! project, students learn about the ways in which sound waves are reflected, absorbed, or transmitted by different materials. In the lesson, students use what they learn about absorbing sound to build sound-insulating containers big enough to hold a phone.
Sound Wave Experiment #3 Make a Cup and String Phone. This is a great classic experiment that's been around as long as I can remember. But it is still so much fun to do with young kids! You need two plastic or paper cups and a long piece of string or yarn. Poke a small hole in the bottom of each cup.
Try these easy sound experiments -- Elementary & Middle School kids will LOVE testing the science of sound with this fun wave experiment to create a 'gong' and explore how sound waves travel! ... One of the coolest sound wave experiments your kids will ever try! We love doing simple science experiments and every once in a while, we find a GEM.
Preparation. Place the speaker in the bowl; make sure it is on and connected to your phone. Cover the top of the bowl with a sheet of wax paper. Wrap the rubber band around the edges of the bowl to secure the paper in place. Sprinkle a layer of sugar or salt over the paper.
Frequency - Wiggles per second (moves back and forth) Amplitude - For transverse waves, it is the maximum height of the wave. Larger amplitudes create louder sounds. Period - The time it takes for one wave to go by. Wavelength - The distance between two successive, identical parts of the wave. Ex. Crest to crest, or trough to trough.
Sound Experiments Steps. I started by using a large slinky and having one child and I hold the ends on opposite sides of the carpet. I banged the slinky to send a wave to the other side. We talked about how sound travels in waves. A big, fast wave equals a loud sound - like someone yelling. A small, slow sound wave may be someone humming.
Experiment with Acoustics Science Projects. (9 results) Experiment with acoustics, the physics of sound, using special apps that let you analyze sound waves. Study sound production, sound absorption, or frequency analysis. Measure the Frequency Response of a Paper Speaker. Add Favorite Remove Favorite More Menu. Read More. Show Others Like This.
The qualities of the sound waves are what make the difference in volume and pitch. In our Nancy Larson Science 4 study of sound, we experimented with volume and pitch to determine what created differences. Volume Experiment. We learned that large vibrations produce louder sounds and small vibrations produce softer sounds. To test this, we used ...
Cut a hole on the top of the box, about 8-10 inches in diameter. This is the sound hole for our instrument. On the top of the box, poke a smaller hole or cut an "x" just large enough to fit the broomstick through. Slide the broomstick through the hole and let it rest on the bottom of the box.
The Experiment: Cut 2 1-inch pieces off of the straw. Stretch your wide rubber band length-wise around a large popsicle stick. Place a straw piece under the rubber band, close to the edge on one end. Place a second popsicle stick directly on top of the one that's already rubber banded. Secure the sticks together at each end using the small ...
5. Create a Thunder Drum! Creating a thunder drum is a unique and exciting way to explore the properties of sound and can help students understand these concepts in a more tangible way. 6. Musical Wine Glasses. The musical wine glass experiment is a fun and easy way to explore the science of sound and create your own musical instrument.
Step 1 - Tear off a piece of plastic wrap big enough to cover the top of the bowl. Step 2 - Secure the plastic wrap over the bowl. Make sure that the plastic wrap is very tight. Step 3 - Pour 1 teaspoon of uncooked rice on the top of the plastic wrap. Step 4 - Hold the metal pan in the air and position it next to the bowl.
Perfect for younger children, the following sound waves experiment not only involves creating a fun musical instrument your child could play with, but teaches kids how length can affect the pitch of sound waves. Supplies Needed: At least 9 or 10 straws, more if desired! Scissors Clear gift wrap tape; What to Do: 1.
Measuring the speed of sound using echoes gives a method for students to do just that! This also helps to reinforce some of the key points used in speed/distance/time ultrasound calculations. Teaching Sound Waves pull-out (from Classroom Physics) puts a few sound experiments together and includes a student sheet to help summarise key points.
Choose one to nine stations to set up for your students (about 5-7 minutes per rotation) Sound Station #1: Electronic Oscillo-piano-scope (5 minutes) Sound Station #2: Straw Pipes of Pan Flute (5 minutes) Sound Station #3: Hydro-Xylophone (5 minutes) Sound Station #4: Making a VERY Old-School Telephone* (5 minutes)
Singing Spoons is a fun way to show kids how volume and pitch change depending on whether sound waves are traveling through the air or through a solid, similar to the way a stethoscope works. It's one of our favorite sound experiments and is pretty easy to set up. Just use tape to connect three metal spoons to a piece of string or yarn.
Using a slinky spring, meter ruler, rubber band, and a few more simple items, you can arrange a demonstration for your students that teaches them about sound waves. Although Longitudinal waves are at the heart of this experiment, be sure to explain where to find the horizontal and vertical axes as well. Learn More: Beta.iop.org. 11.
Sound Wave ExperimentsIn this video, we are going to look at the factors that influence the speed of sound and how to measure it. We will look at sound waves...
Shockwave therapy is a safe and non-invasive treatment method for pain and limited mobility. It's a multifaceted therapy method used in orthopedics, sports medicine, physical therapy, and urology. Shockwaves are sound wave pulsations. In shockwave therapy, a device is used to transfer energy to the treatment area.
Saint Petersburg Shredding - (727)286-3595. When it comes to Florida mobile shredding Legal Shred Inc. is the place to go. With the most advanced shredding equipment on the market today Legal Shred can visit your location and shred 10 boxes in 3 minutes.
When 15-year-old Dhikshit Anoop's mother, Greeshma Anoop, got a call about her son's eye injury in school, she thought he might have to take eye drops for a few days.
There is also a diving school attached to the Oceanarium. The main aquarium of St. Petersburg's Oceanarium Exotic fish at the Oceanarium Electric ray at the Oceanarium Location: 86, Ulitsa Marata: Metro: Zvenigorodskaya: Telephone: +7 (812) 448-0077: Open: Daily from 10am to 10pm (ticket office to 9.15pm)
High School, Experiment with Acoustics Science Projects. (7 results) Experiment with acoustics, the physics of sound, using special apps that let you analyze sound waves. Study sound production, sound absorption, or frequency analysis.
Welcome to St Petersburg High School Home of the Green Devils . 2501 5th Avenue North St. Petersburg, FL 33713 (727) 893-1842 Fax (727) 893-1399 Guidance Fax (727) 893-5542 School Hours - 7:25 to 1:55. Headlines & Features. Alumni credit mom as inspiration for becoming doctors. Comments (-1)