

Simple Reflection of Light Experiment for Kids
Try this reflection of light experiment with your kids. It’s easy! Just grab a flashlight and some everyday objects. Then ask kids to reflect the beam onto the wall.
Ms. Sneed Prepares Her Reflection of Light Experiment
Our favorite fourth grade teacher sat at the side table with her teaching partner. “Let’s continue planning our light energy unit . Next up: reflection of light. It’s another science station, so kids will work in their lab groups.”
“Okay, I’ll pull up the lab sheet,” Mr. Frank replied.
Gathering the Materials
As usual, Ms. Sneed headed toward the science cupboard. Before too long, she returned with a flashlight and a baggie full of everyday objects.
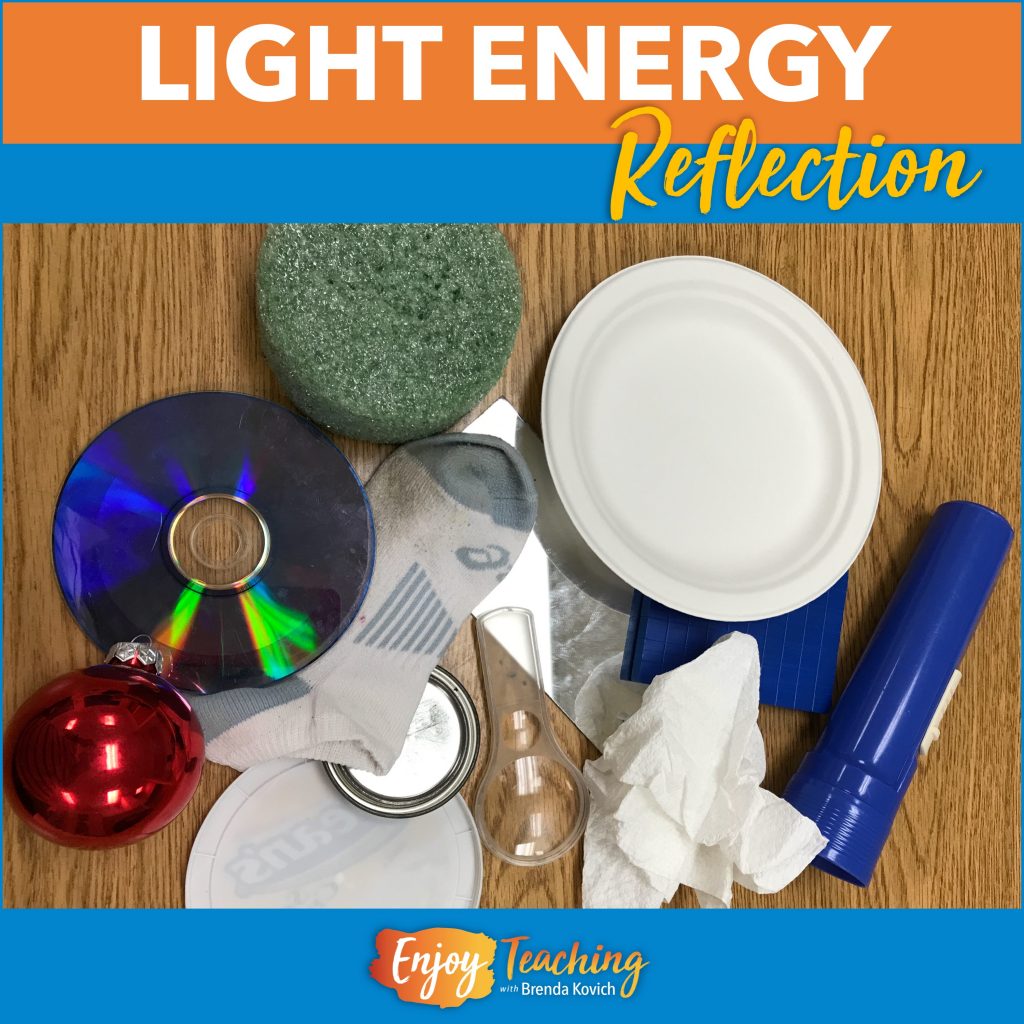
“What do we have here?” she said as she dumped the contents of the bag. “Yep, some shiny, some dark or bumpy, and some in between.”
Mr. Frank chuckled. “Looks like everything but the kitchen sink. But seriously, what an easy lab! With just a flashlight and some random materials – all found right in our classrooms – we can conduct this simple experiment.”
“Yes, and keeping it in a baggie from year to year saves us a bundle of time.”
Positioning the Flashlight
“Hmm,” said Mr. Frank. “I can’t remember exactly how this reflection lab goes.” He picked up a Christmas ornament and the flashlight. Then he walked toward the wall.
“I know that we shine the beam on the object.” He turned on the flashlight. Holding the ornament directly in front of him, he shone the light on it. Unfortunately, the beam bounced off the ornament and onto his dark sweater, where it was absorbed.”
“No,” Ms. Sneed giggled. “Let me show you.” Without a beat, Mr. Frank handed her the flashlight and ornament. Then, as she stood perpendicular to the wall, Ms. Sneed trained the flashlight beam so that it bounced onto the side of the ornament and onto the wall.
“Aha. You shone it almost straight at the wall but with the ornament in between. Maybe at a 140 degree angle? Obviously, I’ll have to model this for my students. Otherwise, they’ll spend too much time figuring it out.”
“Good idea. In my opinion, the actual angle doesn’t matter. Just so the beam bounces onto the wall. That way, kids can analyze how much light actually reflected off of the object.”
Categorizing Reflection of Light
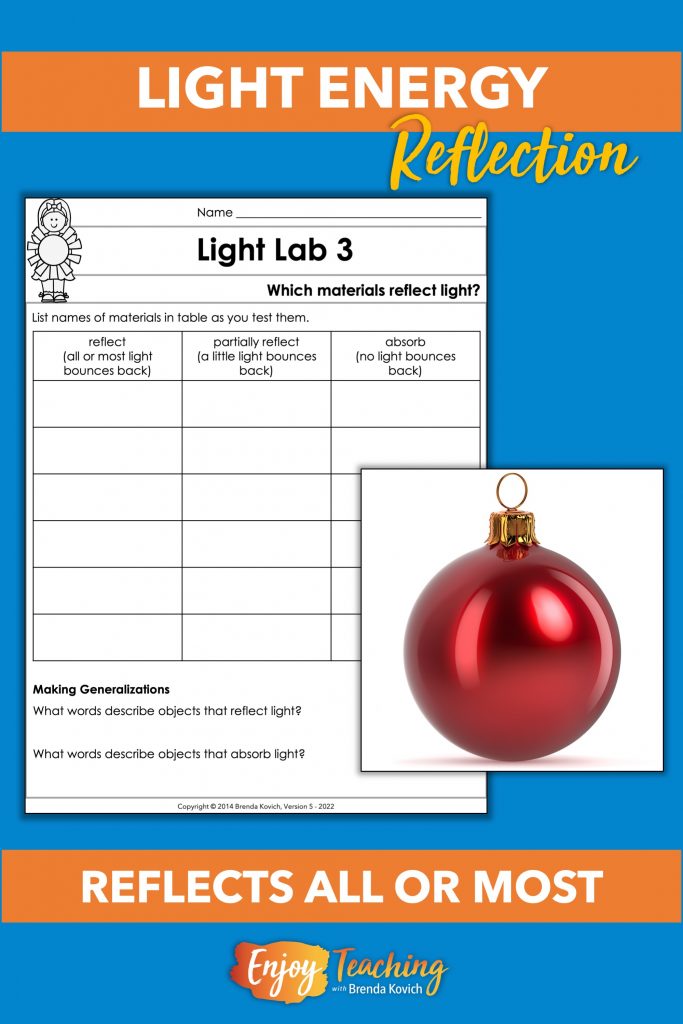
Mr. Frank looked at the screen of his laptop. “The reflection lab sheet has three columns. For the first, kids list stuff that reflects. In other words, all or most light bounces back. For the second, they write objects that partially reflect. And in the third, they place items that absorb.”
Experiment with Reflection of All (or Most) Light
As Ms. Sneed picked through the pile of objects, she pushed shiny things to the side. “When the flashlight shines on the CD, mirror, metal lid, and ornament, all or most of the beam will bounce onto the wall.”
Mr. Frank nodded. “At the bottom of the page, kids have to list words that describe objects that reflect all or most light. Looking at these objects, I’d say ‘shiny.’ What other words could they use?”
“Words like ‘smooth,’ ‘dense,’ and ‘hard’ would also work.”
Experiment with Reflection of Some Light
Next, Ms. Sneed pulled out items that had a little – but not much – luster: a piece of Styrofoam, a plastic lid, and a base-ten block. “For this reflection of light lab, I’d say these fall into the partial column.”
Mr. Frank looked at the remaining items. “Hey, what about this hand lens? It’s dense and smooth, but when the beam hits it, part of it will pass through. That will really make kids think.”
As he spoke, Ms. Sneed picked up a white paper plate. “Hmm, I suppose this will also go in the middle column. Some light will reflect when the flashlight beam hits it.”

Experiment with Absorption of Light
Both teachers looked at the remaining items in the pile: a wadded up piece of paper towel and a sock.
“Because they are bumpy and porous, these should absorb. But as they experiment with reflection of light, kids could argue that a little bit bounces off of them – especially if we darken the room. Additionally, our students may already know that white tends to reflect while black absorbs,” said Mr. Frank.
“Hmm, both of these objects are white. Let’s add a piece of black fabric or a black sock to the bag.”
“Can we take this a little farther? To really make them think, let’s also add something black that’s smooth and has some luster. You know, like a black pool ball or a mini chalkboard. That way, they will find out that a variety of conditions allow light to be absorbed.”
“Great idea,” said Ms. Sneed, “because objects that totally absorb are dark and bumpy.”
The two teachers looked at each other and smiled. Oh how they loved making kids think!

Extending Reflection of Light Lab
“In this p hysical science activity ,” said Mr. Frank, “kids will also rotate through centers that explore characteristics of light , opacity , refraction , and color . If kids finish this station early, they can experiment with reflection of light with objects around the room.”
Enjoy Teaching
“Great!” Ms. Sneed responded. “I love this set of light activities . It lets kids experiment with reflection of light – and more.”
“Not only that,” her teaching partner responded. “They also work independently and become totally engaged.”

- Grades 6-12
- School Leaders
Don't Forget to Enter Today's Very Merry Giveaway!🎁
76 Easy Science Experiments Using Materials You Already Have On Hand
Because science doesn’t have to be complicated.
If there is one thing that is guaranteed to get your students excited, it’s a good science experiment! While some experiments require expensive lab equipment or dangerous chemicals, there are plenty of cool projects you can do with regular household items. We’ve rounded up a big collection of easy science experiments that anybody can try, and kids are going to love them!
Easy Chemistry Science Experiments
Easy physics science experiments, easy biology and environmental science experiments, easy engineering experiments and stem challenges.
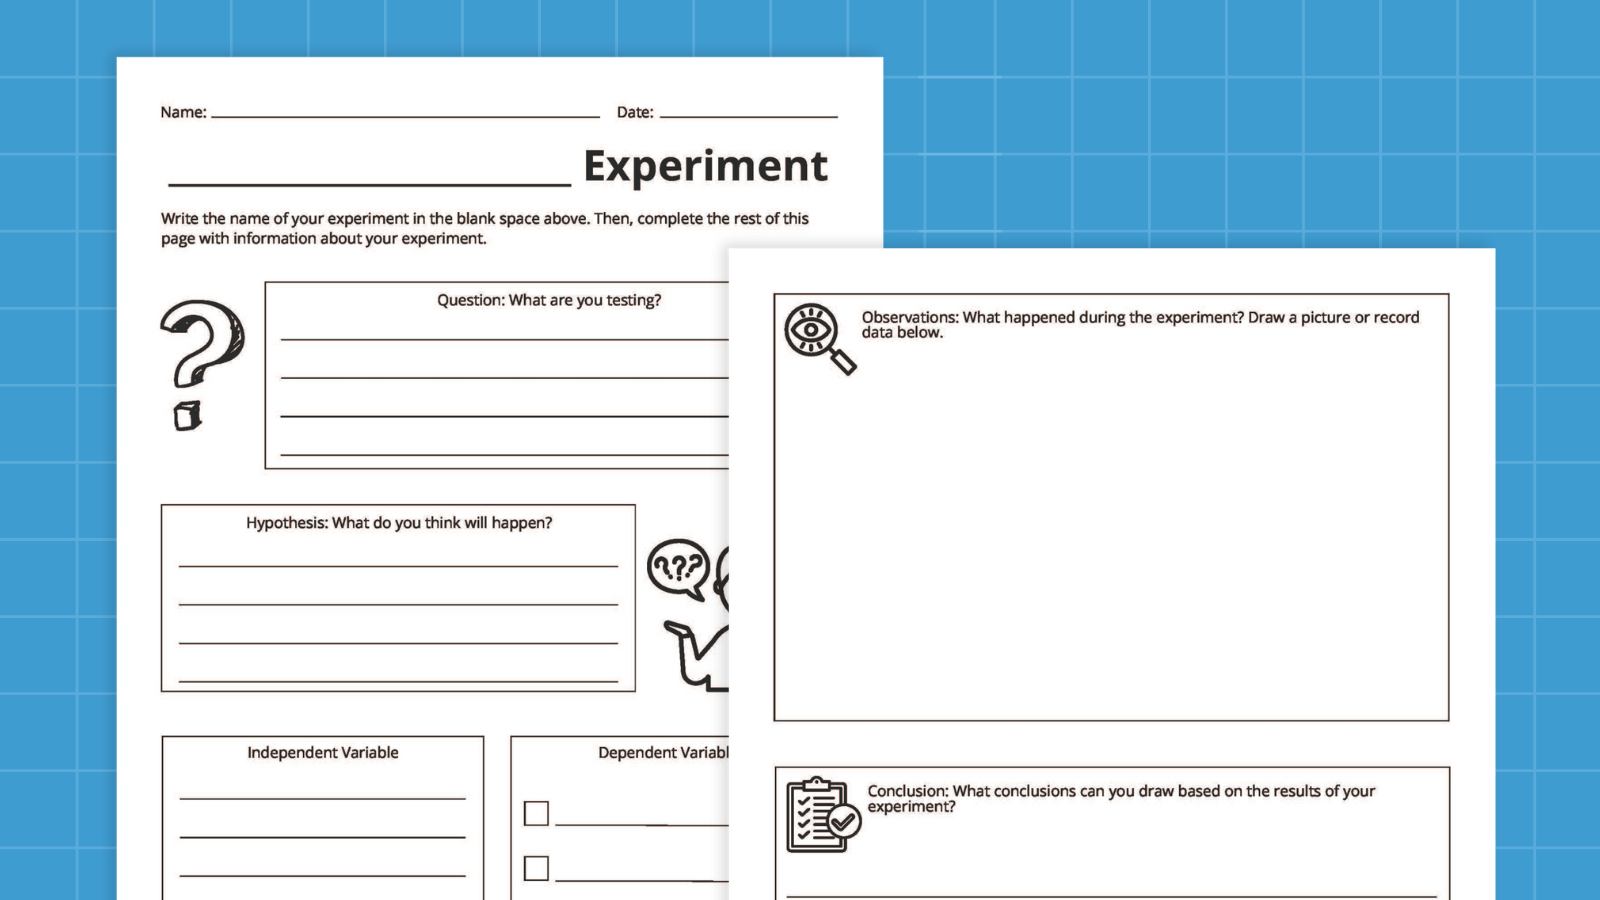
Also, be sure to grab your free printable science experiment recording sheet to use with any of the experiments below.
1. Taste the rainbow
Teach your students about diffusion while creating a beautiful and tasty rainbow. Tip: Have extra Skittles on hand so your class can eat a few!
Learn more: Skittles Diffusion
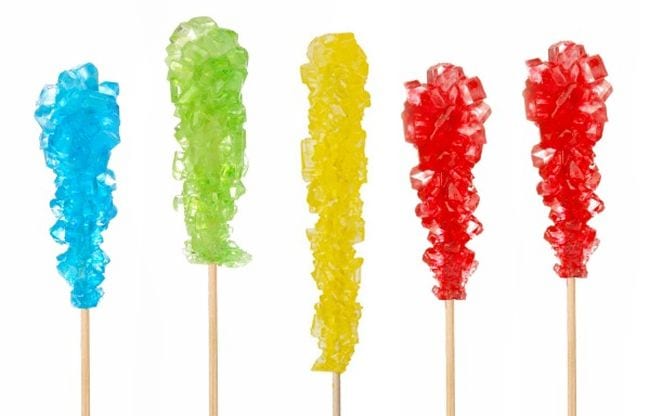
2. Crystallize sweet treats
Crystal science experiments teach kids about supersaturated solutions. This one is easy to do at home, and the results are absolutely delicious!
Learn more: Rock Candy Experiment
3. Make a volcano erupt
This classic experiment demonstrates a chemical reaction between baking soda (sodium bicarbonate) and vinegar (acetic acid), which produces carbon dioxide gas, water, and sodium acetate.
Learn more: Baking Soda Volcano (Guide + Printable Reflection Sheet)
4. Make elephant toothpaste
This fun project uses yeast and a hydrogen peroxide solution to create overflowing “elephant toothpaste.” Tip: Add an extra fun layer by having kids create toothpaste wrappers for plastic bottles.
Learn more: Elephant Toothpaste (Guide + Printable Reflection Sheet)
5. Blow the biggest bubbles you can
Add a few simple ingredients to dish soap solution to create the largest bubbles you’ve ever seen! Kids learn about surface tension as they engineer these bubble-blowing wands.
Learn more: Giant Soap Bubbles (Guide + Printable Reflection Sheet)
6. Demonstrate the “magic” leakproof bag
All you need is a zip-top plastic bag, sharp pencils, and water to blow your kids’ minds. Once they’re suitably impressed, teach them how the “trick” works by explaining the chemistry of polymers.
Learn more: Leakproof Bag (Guide + Printable Reflection Sheet)
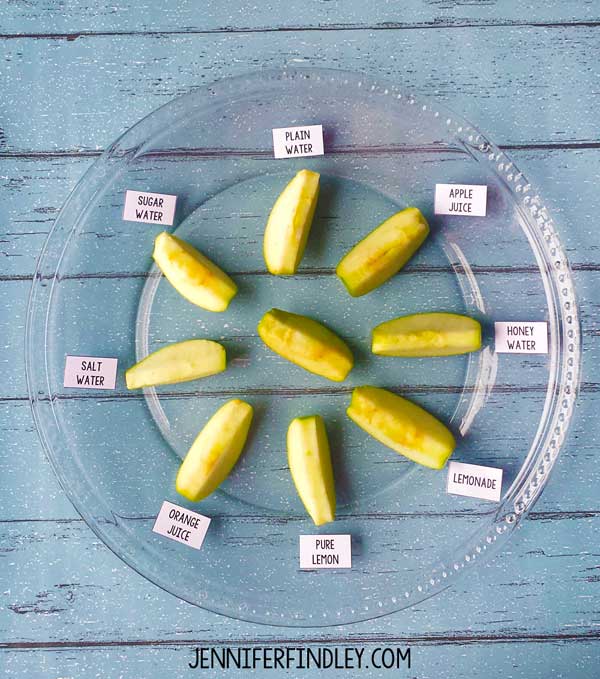
7. Use apple slices to learn about oxidation
Have students make predictions about what will happen to apple slices when immersed in different liquids, then put those predictions to the test. Have them record their observations.
Learn more: Apple Oxidation
8. Float a marker man
Their eyes will pop out of their heads when you “levitate” a stick figure right off the table! This experiment works due to the insolubility of dry-erase marker ink in water, combined with the lighter density of the ink.
Learn more: Floating Marker Man

9. Discover density with hot and cold water
There are a lot of easy science experiments you can do with density. This one is extremely simple, involving only hot and cold water and food coloring, but the visuals make it appealing and fun.
Learn more: Hot and Cold Water Science Experiment
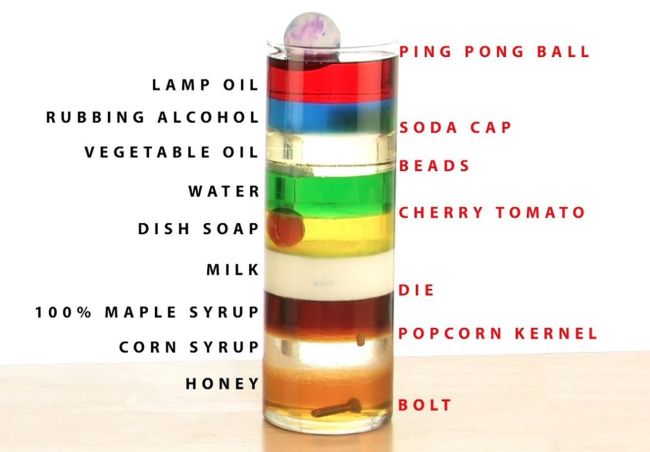
10. Layer more liquids
This density demo is a little more complicated, but the effects are spectacular. Slowly layer liquids like honey, dish soap, water, and rubbing alcohol in a glass. Kids will be amazed when the liquids float one on top of the other like magic (except it is really science).
Learn more: Layered Liquids
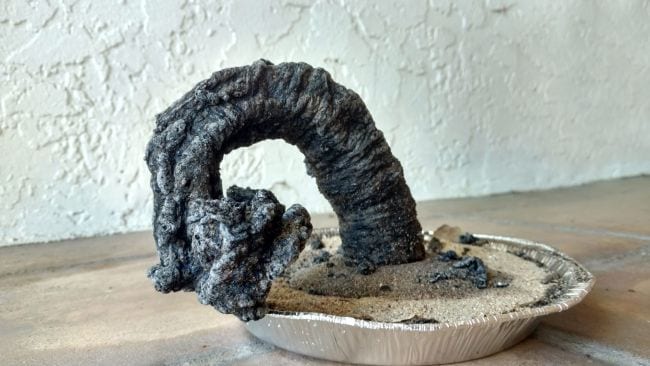
11. Grow a carbon sugar snake
Easy science experiments can still have impressive results. This eye-popping chemical reaction demonstration only requires simple supplies like sugar, baking soda, and sand.
Learn more: Carbon Sugar Snake
12. Mix up some slime
Tell kids you’re going to make slime at home, and watch their eyes light up! There are a variety of ways to make slime, so try a few different recipes to find the one you like best.
Learn more: 4 Slime Recipes (Guide + Printable Reflection Sheet)
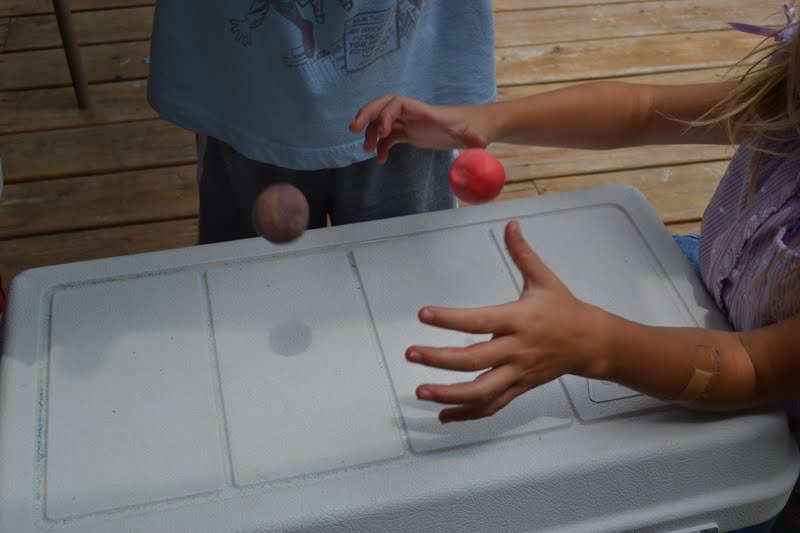
13. Make homemade bouncy balls
These homemade bouncy balls are easy to make since all you need is glue, food coloring, borax powder, cornstarch, and warm water. You’ll want to store them inside a container like a plastic egg because they will flatten out over time.
Learn more: Make-Your-Own Bouncy Balls

14. Create eggshell chalk
Eggshells contain calcium, the same material that makes chalk. Grind them up and mix them with flour, water, and food coloring to make your very own sidewalk chalk.
Learn more: Eggshell Chalk
15. Make naked eggs
This is so cool! Use vinegar to dissolve the calcium carbonate in an eggshell to discover the membrane underneath that holds the egg together. Then, use the “naked” egg for another easy science experiment that demonstrates osmosis .
Learn more: Egg and Vinegar Experiment (Guide + Printable Reflection Sheet)
16. Turn milk into plastic
This sounds a lot more complicated than it is, but don’t be afraid to give it a try. Use simple kitchen supplies to create plastic polymers from plain old milk. Sculpt them into cool shapes when you’re done.
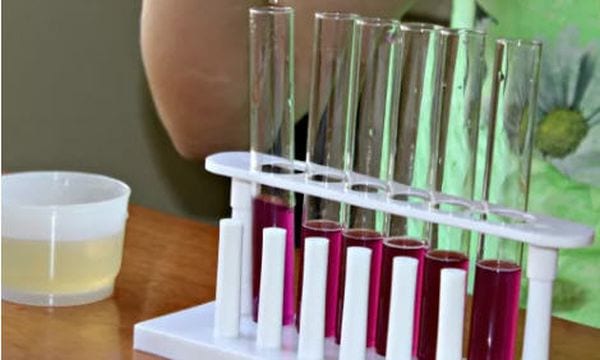
17. Test pH using cabbage
Teach kids about acids and bases without needing pH test strips. Simply boil some red cabbage and use the resulting water to test various substances—acids turn red and bases turn green.
Learn more: Cabbage pH
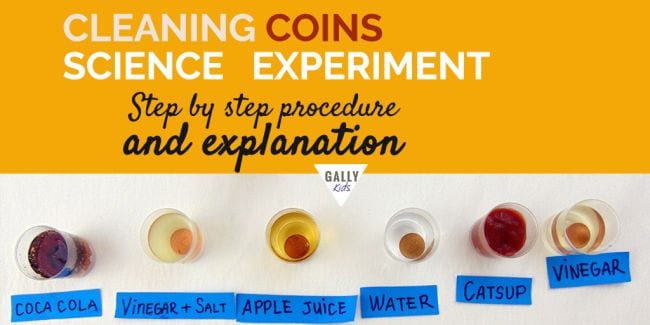
18. Clean some old coins
Use common household items to make old oxidized coins clean and shiny again in this simple chemistry experiment. Ask kids to predict (hypothesize) which will work best, then expand the learning by doing some research to explain the results.
Learn more: Cleaning Coins
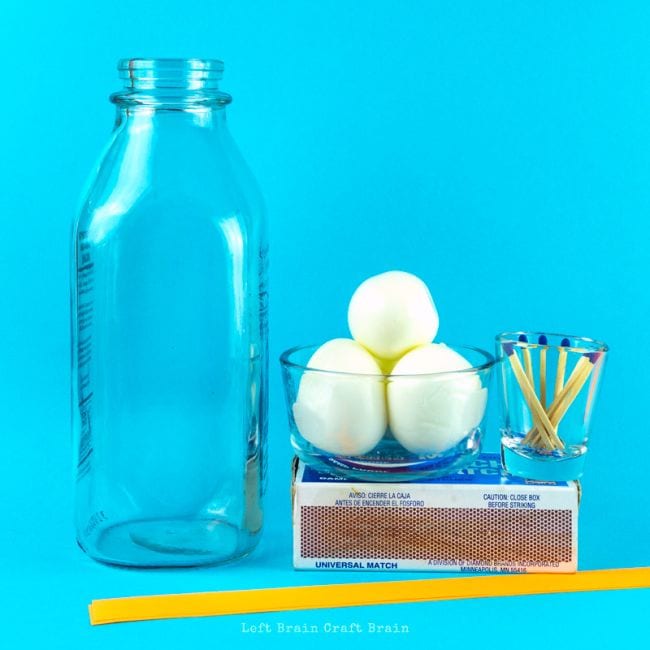
19. Pull an egg into a bottle
This classic easy science experiment never fails to delight. Use the power of air pressure to suck a hard-boiled egg into a jar, no hands required.
Learn more: Egg in a Bottle
20. Blow up a balloon without blowing
Chances are good you probably did easy science experiments like this when you were in school. The baking soda and vinegar balloon experiment demonstrates the reactions between acids and bases when you fill a bottle with vinegar and a balloon with baking soda.
Learn more: Baking Soda and Vinegar Balloon (Guide + Printable Reflection Sheet)
21. Assemble a DIY lava lamp
This 1970s trend is back—as an easy science experiment! This activity combines acid-base reactions with density for a totally groovy result.
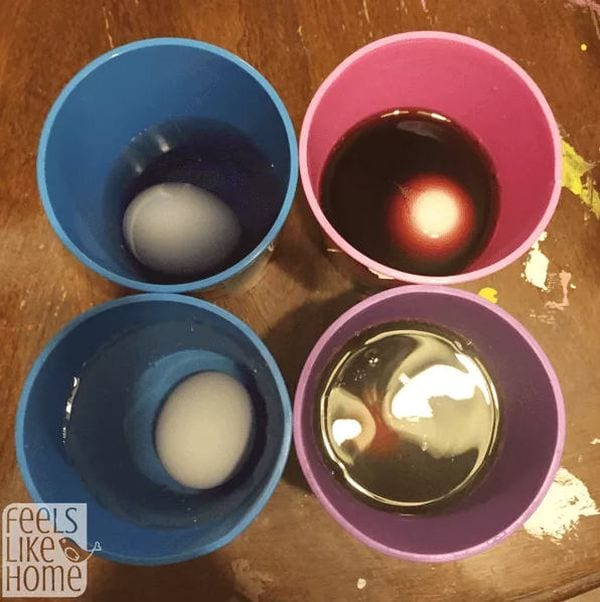
22. Explore how sugary drinks affect teeth
The calcium content of eggshells makes them a great stand-in for teeth. Use eggs to explore how soda and juice can stain teeth and wear down the enamel. Expand your learning by trying different toothpaste-and-toothbrush combinations to see how effective they are.
Learn more: Sugar and Teeth Experiment
23. Mummify a hot dog
If your kids are fascinated by the Egyptians, they’ll love learning to mummify a hot dog! No need for canopic jars , just grab some baking soda and get started.
24. Extinguish flames with carbon dioxide
This is a fiery twist on acid-base experiments. Light a candle and talk about what fire needs in order to survive. Then, create an acid-base reaction and “pour” the carbon dioxide to extinguish the flame. The CO2 gas acts like a liquid, suffocating the fire.
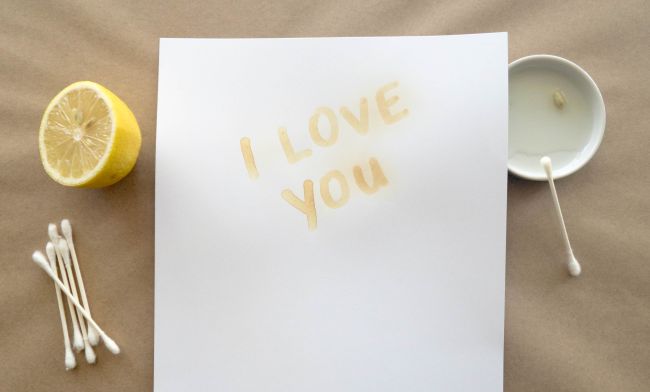
25. Send secret messages with invisible ink
Turn your kids into secret agents. Write messages with a paintbrush dipped in lemon juice, then hold the paper over a heat source and watch the invisible become visible as oxidation goes to work.
Learn more: Invisible Ink
26. Create dancing popcorn
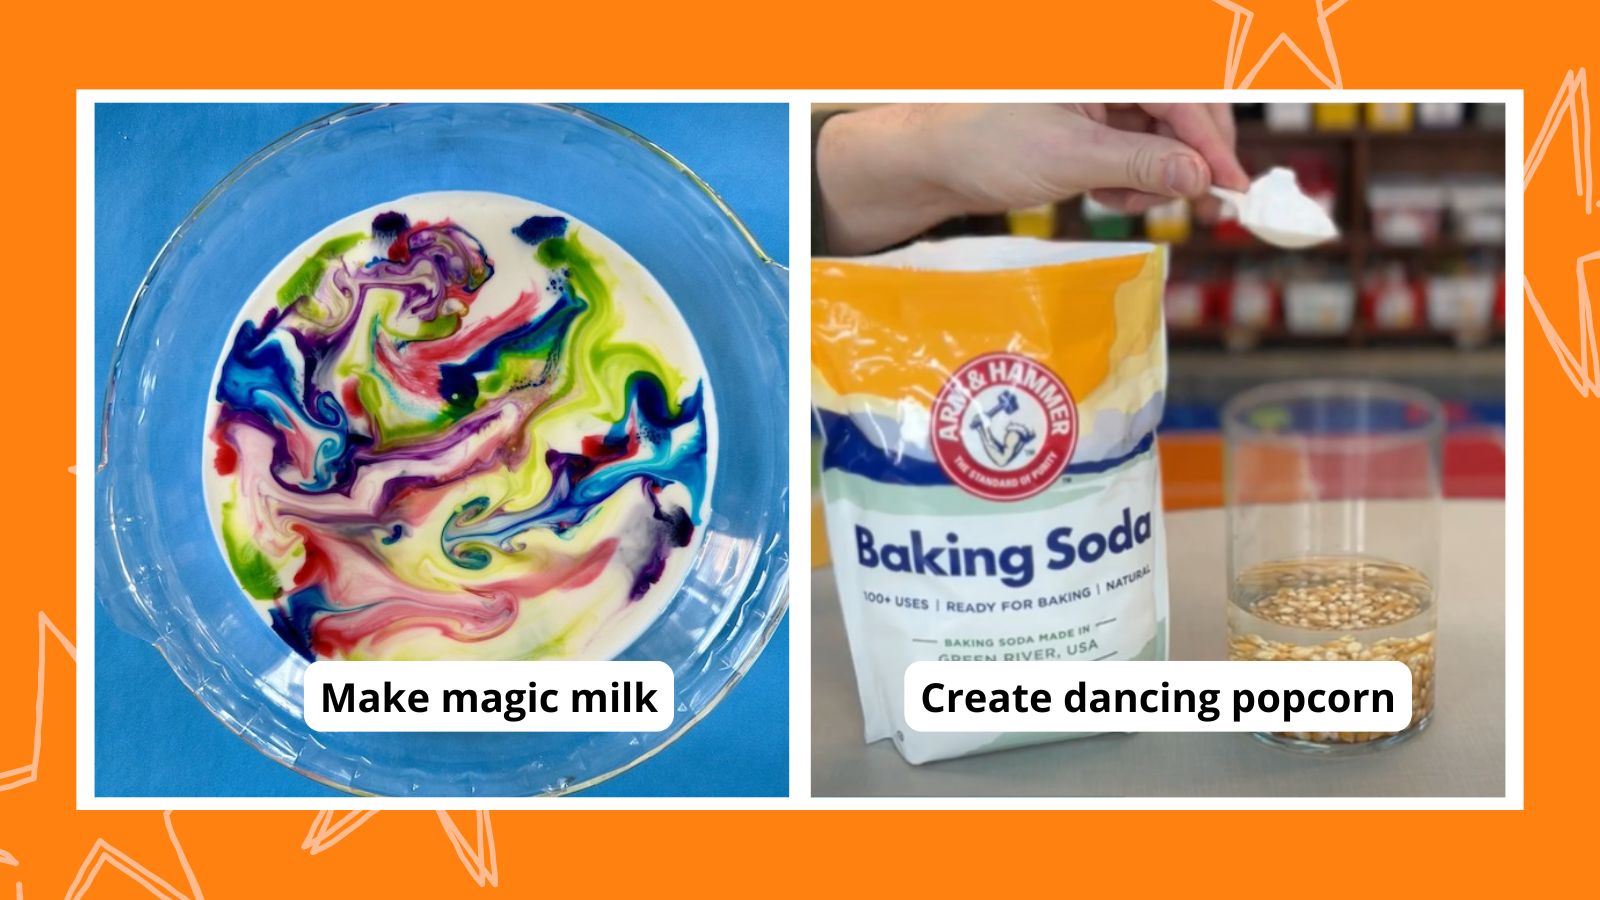
This is a fun version of the classic baking soda and vinegar experiment, perfect for the younger crowd. The bubbly mixture causes popcorn to dance around in the water.
Learn more: Dancing Popcorn (Guide + Printable Reflection Sheet)
27. Shoot a soda geyser sky-high
You’ve always wondered if this really works, so it’s time to find out for yourself. Kids will marvel at the chemical reaction that sends diet soda shooting high in the air when Mentos are added.
Learn more: Mentos and Coke Experiment (Guide + Printable Reflection Sheet)
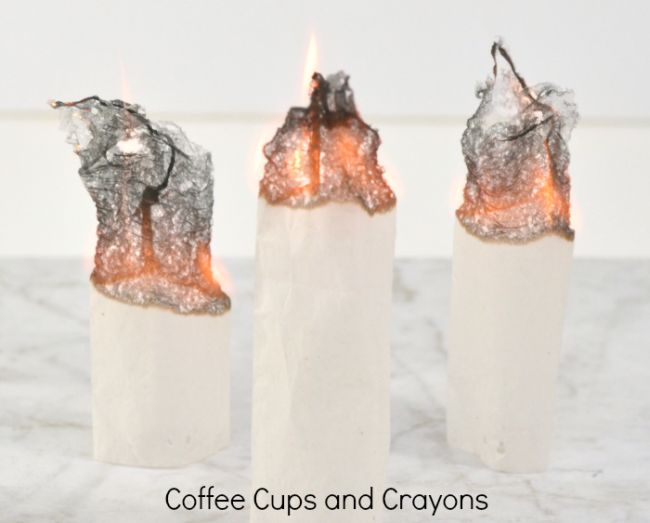
28. Send a teabag flying
Hot air rises, and this experiment can prove it. You’ll want to supervise kids with fire, of course. For added safety, try this one outside.
Learn more: Flying Tea Bags
29. Create magic milk
This fun and easy science experiment demonstrates principles related to surface tension, molecular interactions, and fluid dynamics.
Learn more: Magic Milk Experiment (Guide + Printable Reflection Sheet)
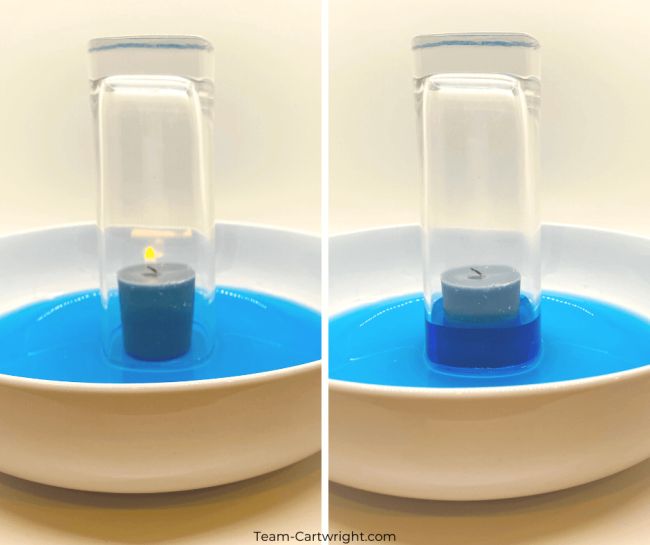
30. Watch the water rise
Learn about Charles’s law with this simple experiment. As the candle burns, using up oxygen and heating the air in the glass, the water rises as if by magic.
Learn more: Rising Water Experiment
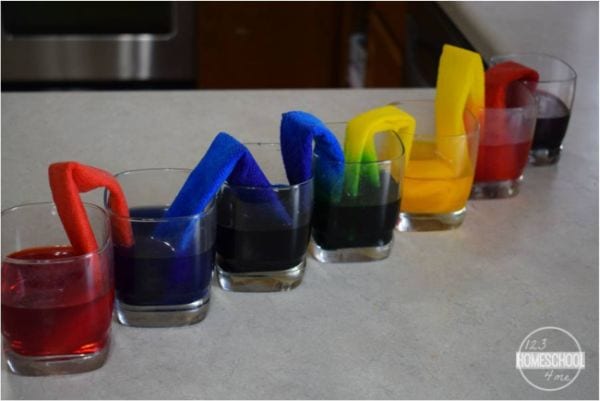
31. Learn about capillary action
Kids will be amazed as they watch the colored water move from glass to glass, and you’ll love the easy and inexpensive setup. Gather some water, paper towels, and food coloring to teach the scientific magic of capillary action.
Learn more: Capillary Action
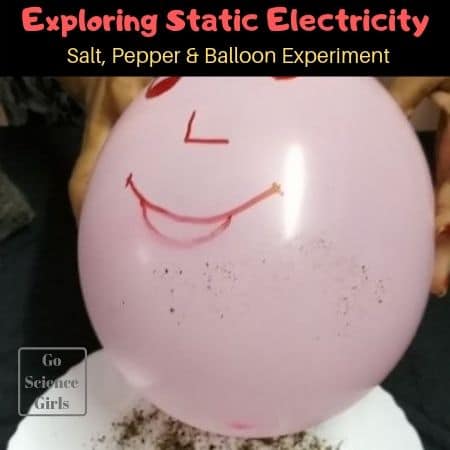
32. Give a balloon a beard
Equally educational and fun, this experiment will teach kids about static electricity using everyday materials. Kids will get a kick out of creating beards on their balloon people!
Learn more: Static Electricity
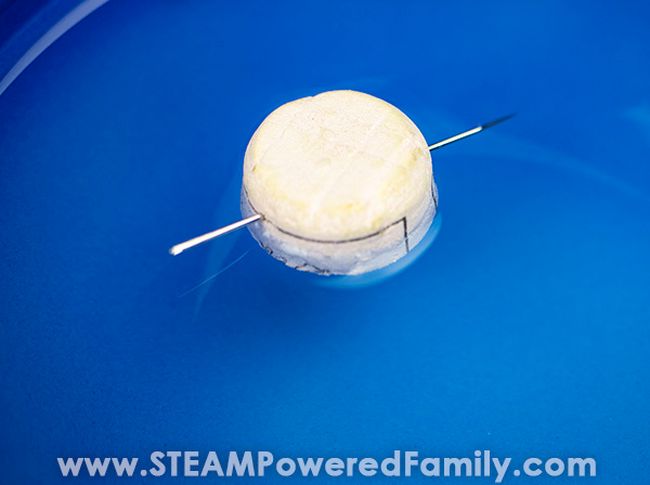
33. Find your way with a DIY compass
Here’s an old classic that never fails to impress. Magnetize a needle, float it on the water’s surface, and it will always point north.
Learn more: How To Make a Compass
34. Crush a can using air pressure
Sure, it’s easy to crush a soda can with your bare hands, but what if you could do it without touching it at all? That’s the power of air pressure!
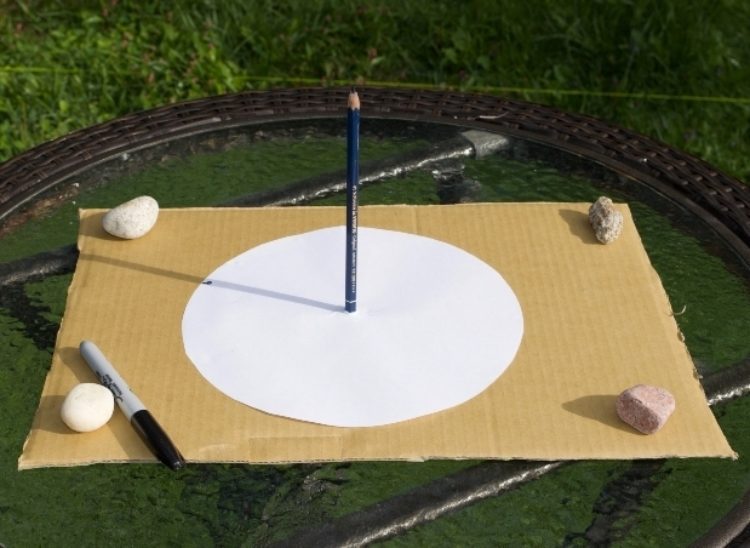

35. Tell time using the sun
While people use clocks or even phones to tell time today, there was a time when a sundial was the best means to do that. Kids can create their own sundials using everyday materials like cardboard and pencils.
Learn more: Make Your Own Sundial
36. Launch a bottle rocket
Grab a cork, plastic bottle, cardboard, duct tape, and bike pump to learn about the laws of motion.
Learn more: Bottle Rocket (Guide + Printable Reflection Sheet)
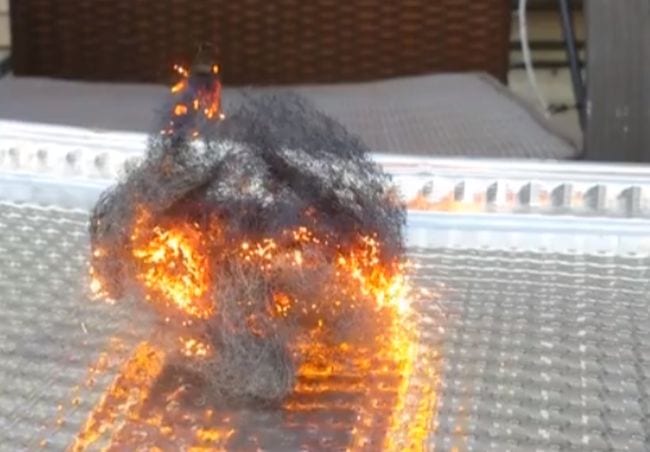
37. Make sparks with steel wool
All you need is steel wool and a 9-volt battery to perform this science demo that’s bound to make their eyes light up! Kids learn about chain reactions, chemical changes, and more.
Learn more: Steel Wool Electricity
38. Levitate a Ping-Pong ball
This experiment is really all about Bernoulli’s principle. You only need plastic bottles, bendy straws, and Ping-Pong balls to make the science magic happen.
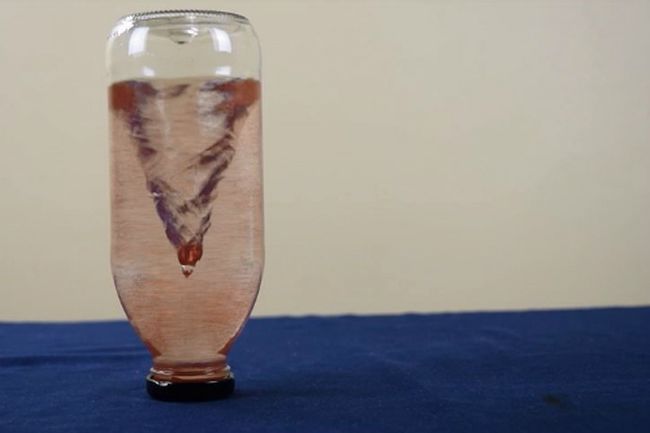
39. Whip up a tornado in a bottle
There are plenty of versions of this classic experiment out there, but we love this one because it sparkles. Kids learn about a vortex and what it takes to create one.
Learn more: Tornado in a Bottle
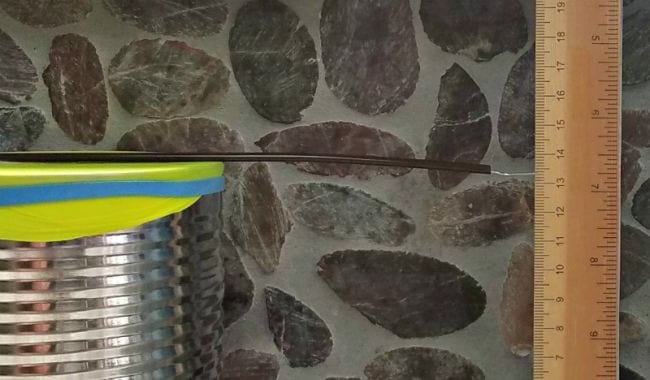
40. Monitor air pressure with a DIY barometer
This simple but effective DIY science project teaches kids about air pressure and meteorology. They’ll have fun tracking and predicting the weather with their very own barometer.
Learn more: How To Make a Barometer
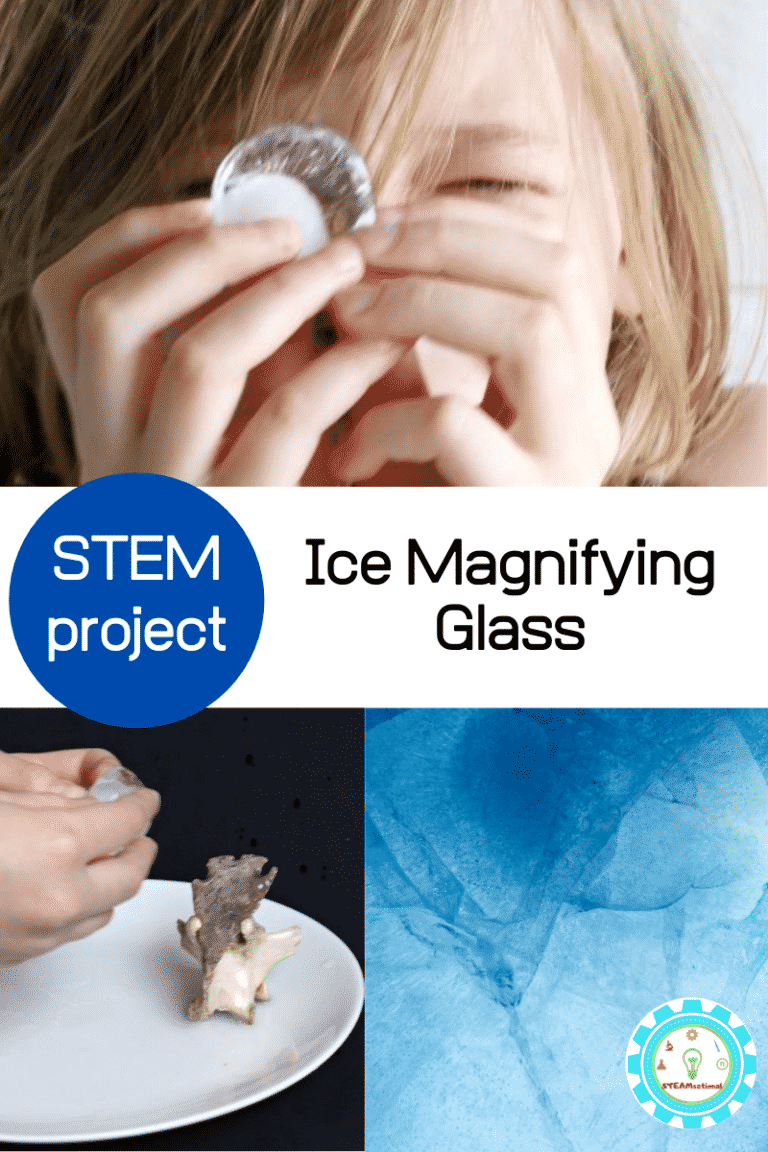
41. Peer through an ice magnifying glass
Students will certainly get a thrill out of seeing how an everyday object like a piece of ice can be used as a magnifying glass. Be sure to use purified or distilled water since tap water will have impurities in it that will cause distortion.
Learn more: Ice Magnifying Glass
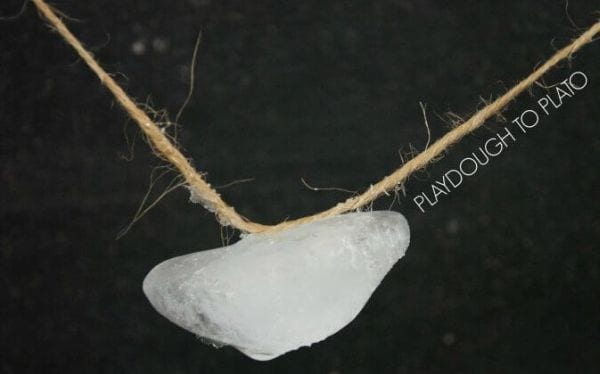
42. String up some sticky ice
Can you lift an ice cube using just a piece of string? This quick experiment teaches you how. Use a little salt to melt the ice and then refreeze the ice with the string attached.
Learn more: Sticky Ice
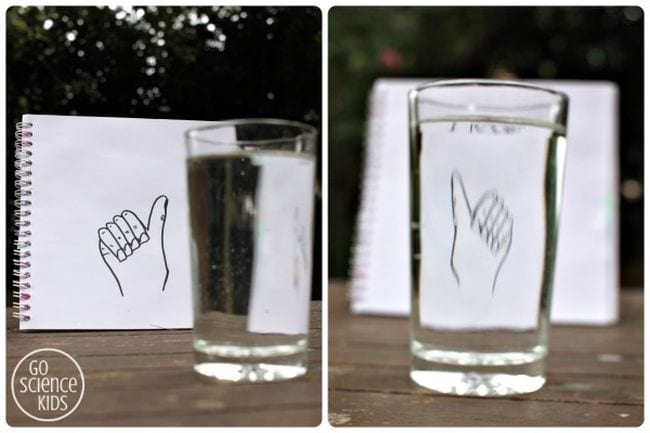
43. “Flip” a drawing with water
Light refraction causes some really cool effects, and there are multiple easy science experiments you can do with it. This one uses refraction to “flip” a drawing; you can also try the famous “disappearing penny” trick .
Learn more: Light Refraction With Water
44. Color some flowers
We love how simple this project is to re-create since all you’ll need are some white carnations, food coloring, glasses, and water. The end result is just so beautiful!
45. Use glitter to fight germs
Everyone knows that glitter is just like germs—it gets everywhere and is so hard to get rid of! Use that to your advantage and show kids how soap fights glitter and germs.
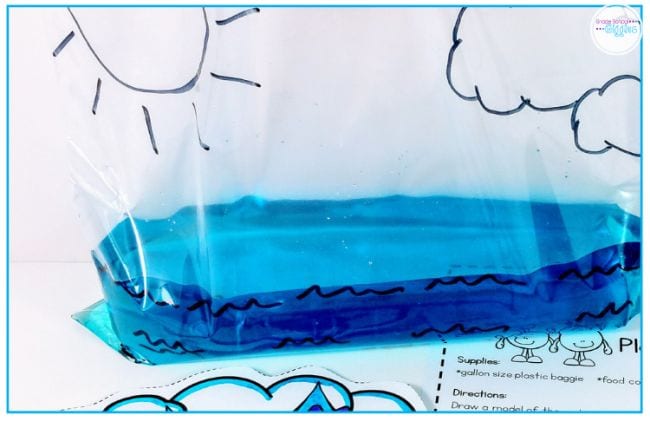
46. Re-create the water cycle in a bag
You can do so many easy science experiments with a simple zip-top bag. Fill one partway with water and set it on a sunny windowsill to see how the water evaporates up and eventually “rains” down.
Learn more: Water Cycle in a Bag and Water Cycle Lesson Slides and Video
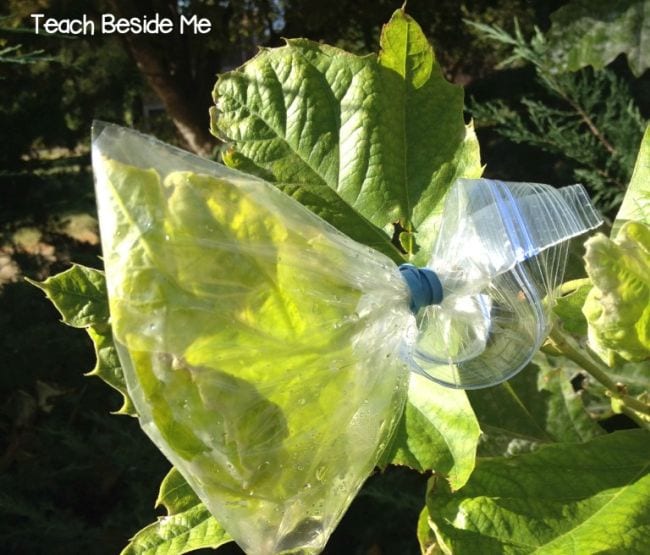
47. Learn about plant transpiration
Your backyard is a terrific place for easy science experiments. Grab a plastic bag and rubber band to learn how plants get rid of excess water they don’t need, a process known as transpiration.
Learn more: Plant Transpiration
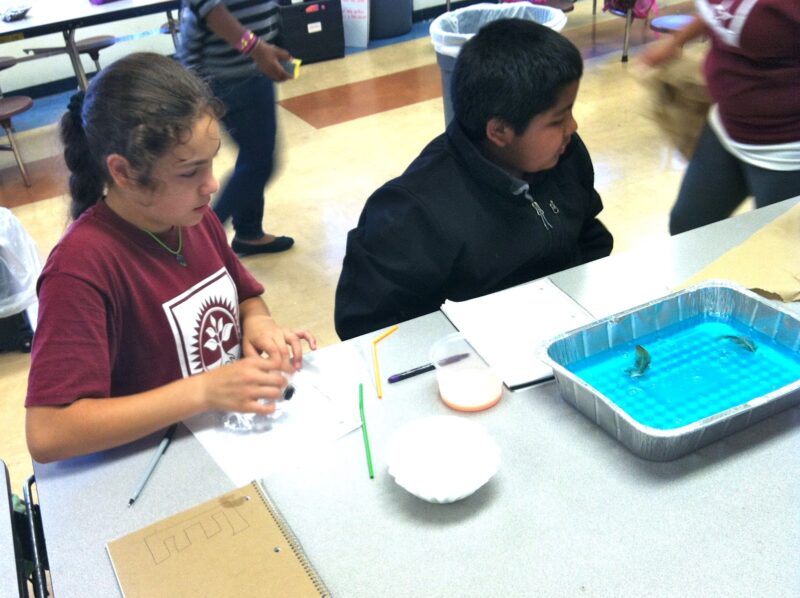
48. Clean up an oil spill
Before conducting this experiment, teach your students about engineers who solve environmental problems like oil spills. Then, have your students use provided materials to clean the oil spill from their oceans.
Learn more: Oil Spill
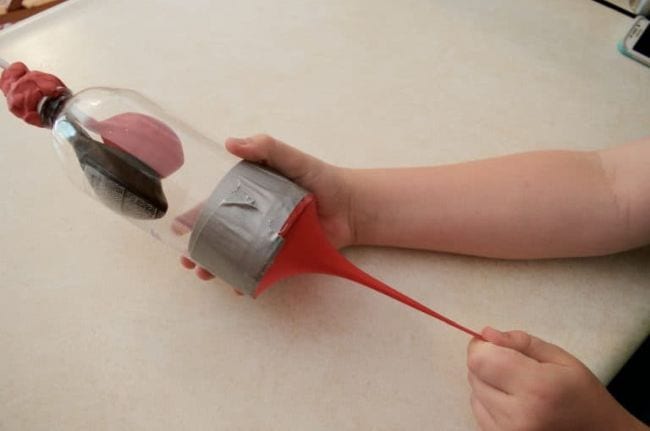
49. Construct a pair of model lungs
Kids get a better understanding of the respiratory system when they build model lungs using a plastic water bottle and some balloons. You can modify the experiment to demonstrate the effects of smoking too.
Learn more: Lung Science Experiment
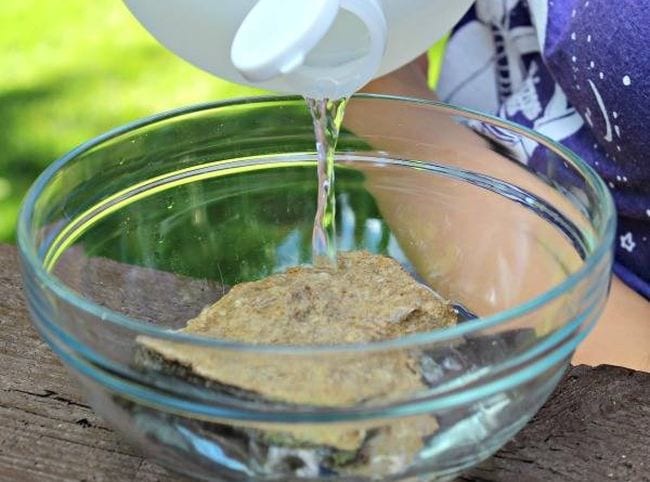
50. Experiment with limestone rocks
Kids love to collect rocks, and there are plenty of easy science experiments you can do with them. In this one, pour vinegar over a rock to see if it bubbles. If it does, you’ve found limestone!
Learn more: Limestone Experiments
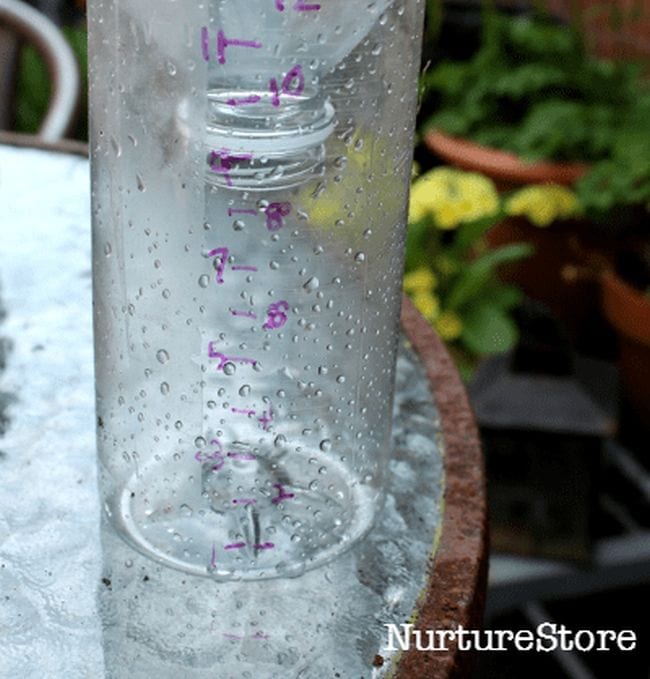
51. Turn a bottle into a rain gauge
All you need is a plastic bottle, a ruler, and a permanent marker to make your own rain gauge. Monitor your measurements and see how they stack up against meteorology reports in your area.
Learn more: How To Make a Rain Gauge
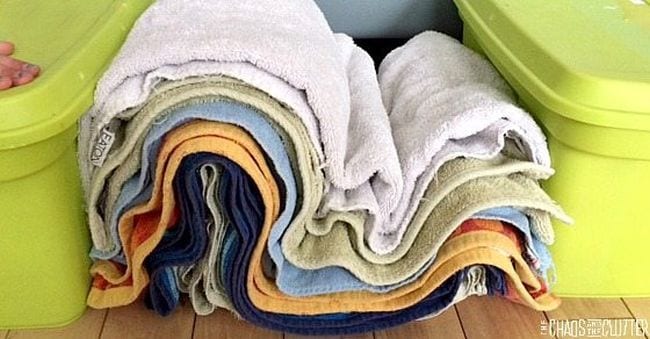
52. Build up towel mountains
This clever demonstration helps kids understand how some landforms are created. Use layers of towels to represent rock layers and boxes for continents. Then pu-u-u-sh and see what happens!
Learn more: Towel Mountains
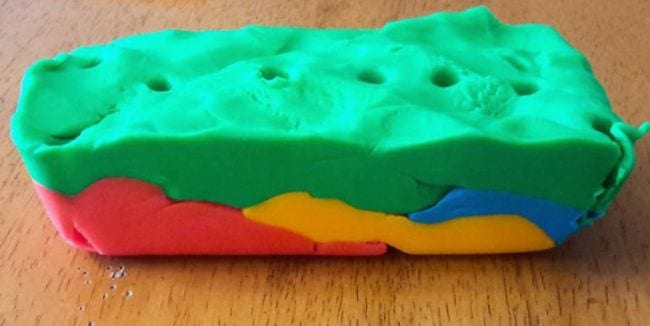
53. Take a play dough core sample
Learn about the layers of the earth by building them out of play dough, then take a core sample with a straw. ( Love Play-Doh? Get more learning ideas here. )
Learn more: Play Dough Core Sampling
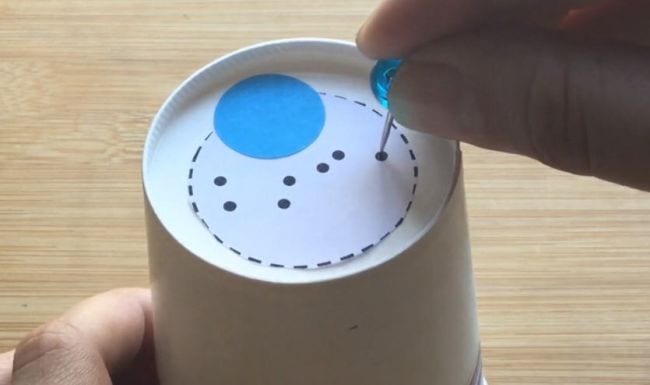
54. Project the stars on your ceiling
Use the video lesson in the link below to learn why stars are only visible at night. Then create a DIY star projector to explore the concept hands-on.
Learn more: DIY Star Projector
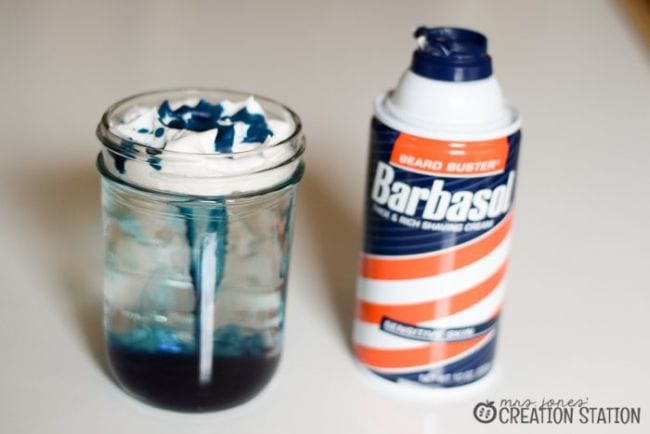
55. Make it rain
Use shaving cream and food coloring to simulate clouds and rain. This is an easy science experiment little ones will beg to do over and over.
Learn more: Shaving Cream Rain
56. Blow up your fingerprint
This is such a cool (and easy!) way to look at fingerprint patterns. Inflate a balloon a bit, use some ink to put a fingerprint on it, then blow it up big to see your fingerprint in detail.
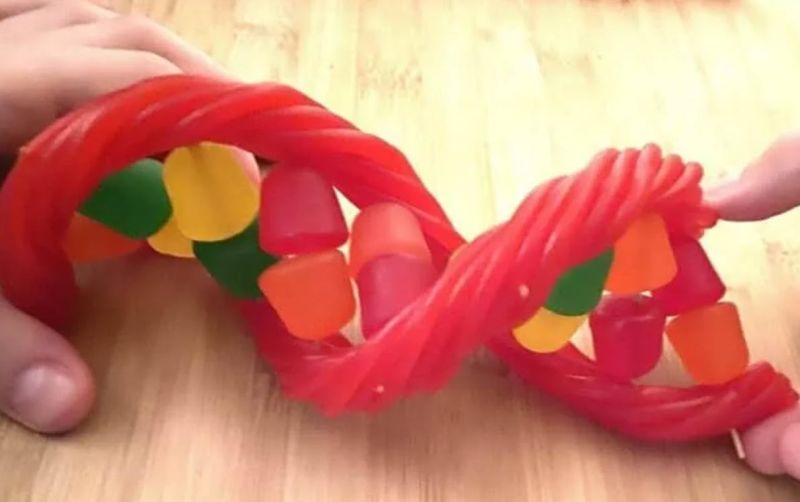
57. Snack on a DNA model
Twizzlers, gumdrops, and a few toothpicks are all you need to make this super-fun (and yummy!) DNA model.
Learn more: Edible DNA Model
58. Dissect a flower
Take a nature walk and find a flower or two. Then bring them home and take them apart to discover all the different parts of flowers.
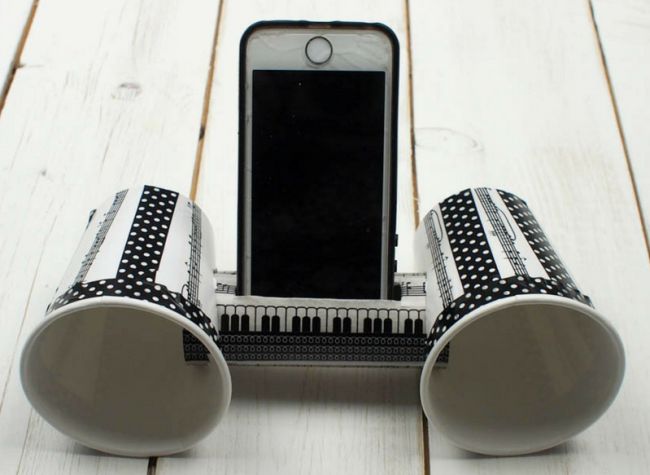
59. Craft smartphone speakers
No Bluetooth speaker? No problem! Put together your own from paper cups and toilet paper tubes.
Learn more: Smartphone Speakers
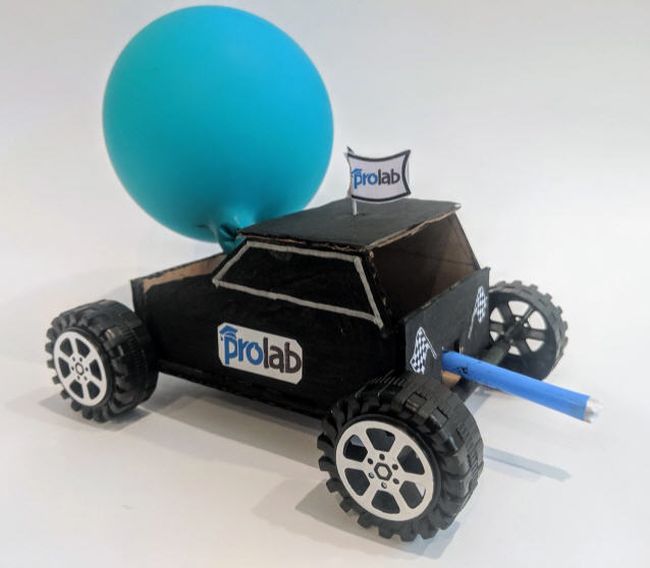
60. Race a balloon-powered car
Kids will be amazed when they learn they can put together this awesome racer using cardboard and bottle-cap wheels. The balloon-powered “engine” is so much fun too.
Learn more: Balloon-Powered Car
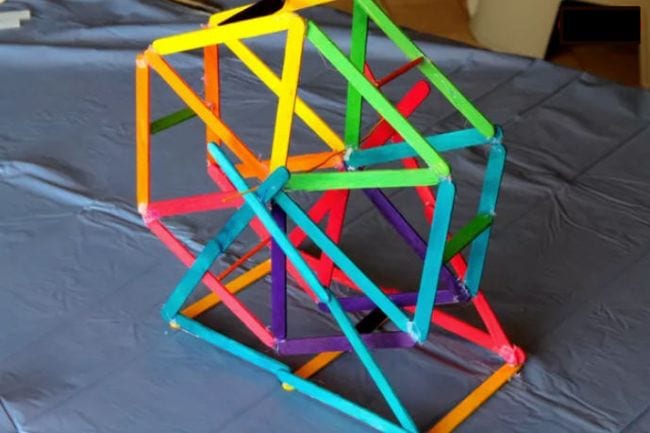
61. Build a Ferris wheel
You’ve probably ridden on a Ferris wheel, but can you build one? Stock up on wood craft sticks and find out! Play around with different designs to see which one works best.
Learn more: Craft Stick Ferris Wheel
62. Design a phone stand
There are lots of ways to craft a DIY phone stand, which makes this a perfect creative-thinking STEM challenge.
63. Conduct an egg drop
Put all their engineering skills to the test with an egg drop! Challenge kids to build a container from stuff they find around the house that will protect an egg from a long fall (this is especially fun to do from upper-story windows).
Learn more: Egg Drop Challenge Ideas
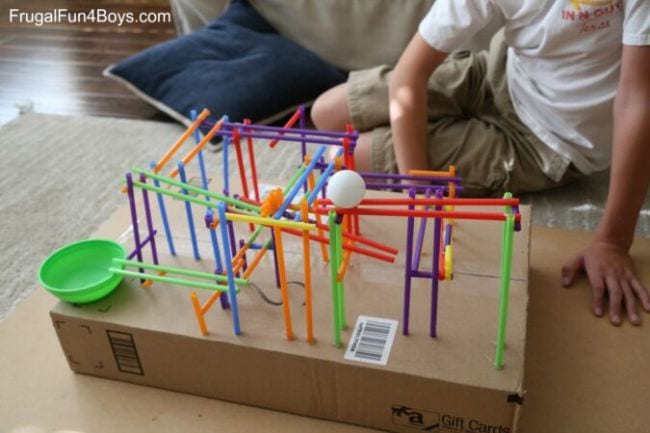
64. Engineer a drinking-straw roller coaster
STEM challenges are always a hit with kids. We love this one, which only requires basic supplies like drinking straws.
Learn more: Straw Roller Coaster
65. Build a solar oven
Explore the power of the sun when you build your own solar ovens and use them to cook some yummy treats. This experiment takes a little more time and effort, but the results are always impressive. The link below has complete instructions.
Learn more: Solar Oven (Guide + Printable Reflection Sheet)
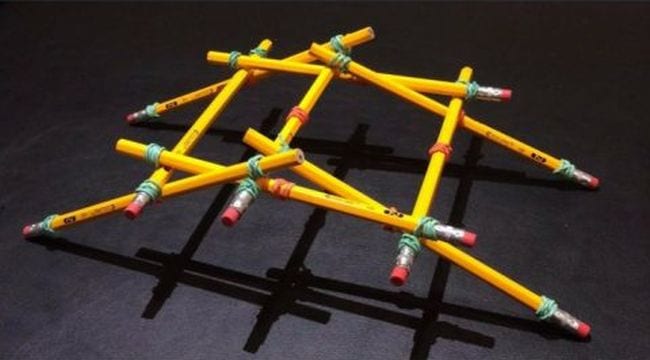
66. Build a Da Vinci bridge
There are plenty of bridge-building experiments out there, but this one is unique. It’s inspired by Leonardo da Vinci’s 500-year-old self-supporting wooden bridge. Learn how to build it at the link, and expand your learning by exploring more about Da Vinci himself.
Learn more: Da Vinci Bridge
67. Step through an index card
This is one easy science experiment that never fails to astonish. With carefully placed scissor cuts on an index card, you can make a loop large enough to fit a (small) human body through! Kids will be wowed as they learn about surface area.
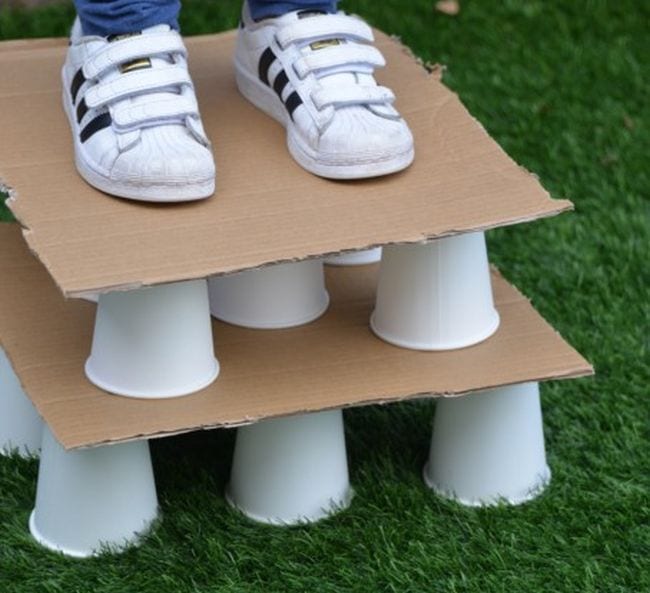
68. Stand on a pile of paper cups
Combine physics and engineering and challenge kids to create a paper cup structure that can support their weight. This is a cool project for aspiring architects.
Learn more: Paper Cup Stack
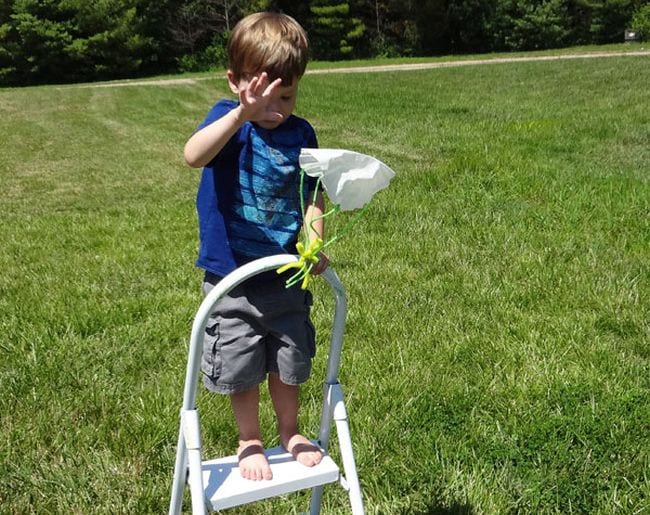
69. Test out parachutes
Gather a variety of materials (try tissues, handkerchiefs, plastic bags, etc.) and see which ones make the best parachutes. You can also find out how they’re affected by windy days or find out which ones work in the rain.
Learn more: How To Make a Parachute
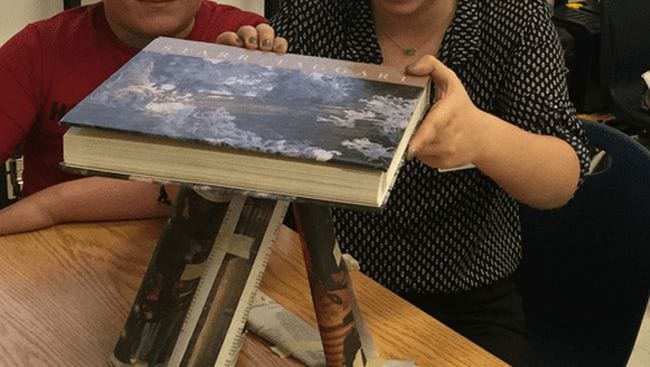
70. Recycle newspapers into an engineering challenge
It’s amazing how a stack of newspapers can spark such creative engineering. Challenge kids to build a tower, support a book, or even build a chair using only newspaper and tape!
Learn more: Newspaper STEM Challenge
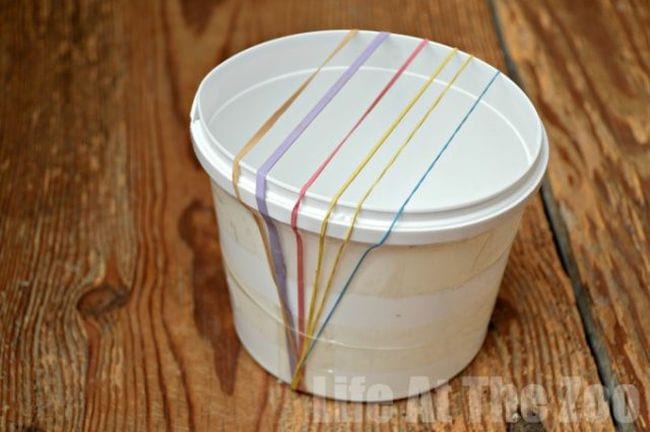
71. Use rubber bands to sound out acoustics
Explore the ways that sound waves are affected by what’s around them using a simple rubber-band “guitar.” (Kids absolutely love playing with these!)
Learn more: Sound Experiment
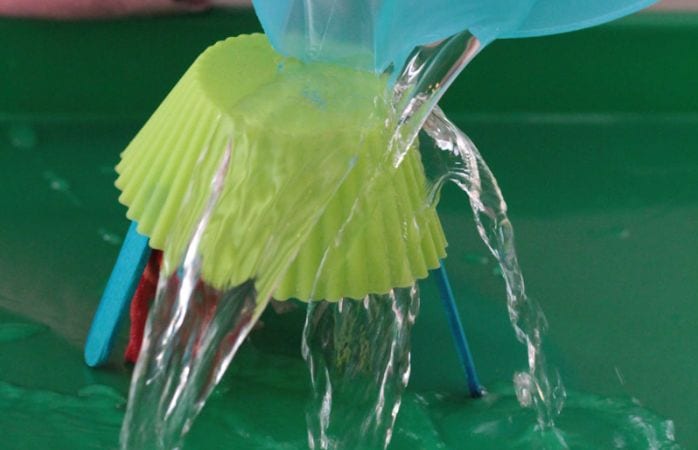
72. Assemble a better umbrella
Challenge students to engineer the best possible umbrella from various household supplies. Encourage them to plan, draw blueprints, and test their creations using the scientific method.
Learn more: Umbrella STEM Challenge
73. Grow rock candy
Turn science into a sweet treat by making rock candy. Dissolve sugar in hot water to create a solution, then let it cool as crystals slowly form on a stick or string. The best part is that the kids get to eat their experiment when it’s done!
74. Create a rain cloud in a jar
Bring weather science indoors with this fun hands-on project. Use shaving cream to mimic clouds and add drops of food coloring to simulate rain. It’s a great way to explore the water cycle without even having to step outside!
75. Brighten up with rainbow celery
Make your science lesson more vibrant with a splash of color. Drop celery stalks into glasses of water with food dye, and watch as the beautiful colors travel up through the stems.
76. Safely view a solar eclipse
Teach your students about the solar eclipse, and help them safely view this exciting event with just a few simple materials.
Learn more: Solar Eclipse Viewer (Guide + Printable Reflection Sheet)
Get your free printable science experiment recording sheet!
Just fill out the form on this page to get instant access to your free printable experiment recording sheet.
Plus, visit our science hub for everything science for grades K-12!
Sign up for our newsletters to get all the latest learning ideas straight to your inbox..
You Might Also Like
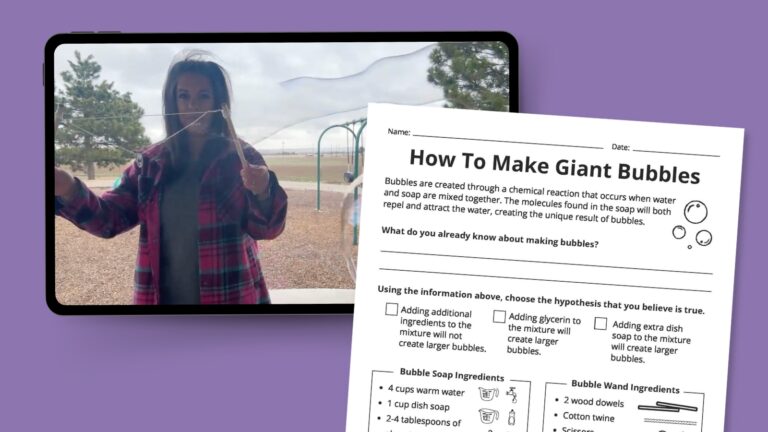
Giant Bubbles Experiment: How-To Plus Free Worksheet
It'll blow everyone away! Continue Reading
Copyright © 2024. All rights reserved. 5335 Gate Parkway, Jacksonville, FL 32256

IMAGES
COMMENTS
Science Experiment Sheet Light (Reflection) Use the equipment to investigate how a beam of light is reflected from a mirror. Trace the path of the light beam onto a piece of paper, drawing the light source and mirror in their correct positions. 1. What do you notice about the direction of the beam striking the
Write a word on a piece of paper, and place it in between the mirrors at 60 degrees. Look closely at the second reflection (the reflection of the reflection). Can you read the text? Why do you think this is happening? Results. You will see an ever-increasing number of objects as you move the mirrors closer together (reducing the angle between ...
Next up: reflection of light. It’s another science station, so kids will work in their lab groups.” “Okay, I’ll pull up the lab sheet,” Mr. Frank replied. Gathering the Materials. As usual, Ms. Sneed headed toward the science cupboard. Before too long, she returned with a flashlight and a baggie full of everyday objects.
Apr 26, 2021 · Grade5: light reflection - mirror experiment 948455 worksheets by Ms Mai Yusuf .Grade5: light reflection - mirror experiment worksheet LiveWorksheets Liveworksheets transforms your traditional printable worksheets into self-correcting interactive exercises that the students can do online and send to the teacher.
Observe: What does your reflection look like on the spoons now? Is the reflection upside down or the right way up? Interpret together: could this have something to do with the problem Pi described to us? Phase 2: Dancing on the Ceiling. Now, place also the small mirrors on the floor among the spoons. Dim the lights in the room at this point.
Dec 16, 2024 · Chances are good you probably did easy science experiments like this when you were in school. The baking soda and vinegar balloon experiment demonstrates the reactions between acids and bases when you fill a bottle with vinegar and a balloon with baking soda. Learn more: Baking Soda and Vinegar Balloon (Guide + Printable Reflection Sheet)